Your living space is more than just a place to reside; it expresses your unique style and personality. Creating a cosy and personalized environment is essential in a constantly changing world. Whether you own your home or rent, you can infuse your space with your individuality without nonsignificant financial investments or permanent alter Comprehensive comprehensive article delves into three exciting DIY topics that empower you to transform your living space. We’ll explore the world of DIY remodels and rental-friendly upgrades, venture into the mesmerizing realm of paint-pour art, and get creative with DIY holiday decorations.
DIY Remodel & Rental-Friendly Upgrades
Remodeling your space can be a game-changer for making it feel like home. However, if you’re renting or prefer temporary changes, rental-friendly upgrades can provide the perfect solution. We’ll start by discussing two creative options.
Peel-and-Stick Backsplashes
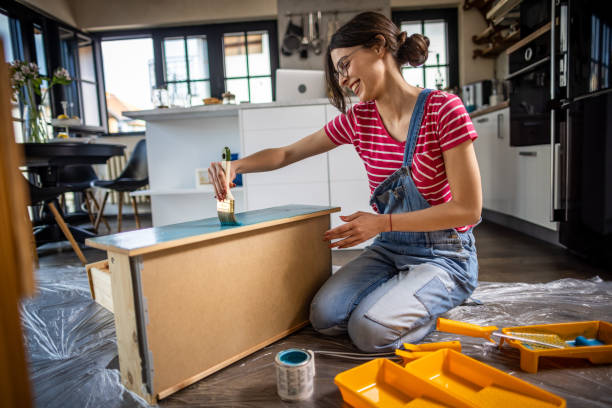
One of the most impactful and accessible ways to refresh your kitchen or bathroom is with peel-and-stick backsplashes. These versatile additions protect your walls and bring a trendy look to your space.

Peel-and-stick backsplashes are a revelation in the world of interior design. They’re not only aesthetically pleasing but also practical. In this subsection, we’ll explore their numerous advantages. These backsplashes are durable, moisture-resistant, and incredibly easy to install. We’ll provide step-by-step guidance on installing them, share tips to ensure a seamless process, and even discuss their removal process, which leaves no damage behind.
Peel-and-stick backsplashes offer a fantastic range of possibilities. You can choose various styles and materials to suit your taste and existing décor. Whether you prefer a sleek and modern look or a rustic and traditional ambience, a peel-and-stick backsplash fits your vision. And the best part? Installation is a breeze.
For installation, you’ll need the backsplash sheets, a ruler or straight edge, a utility knife, and a cutting mat. Begin by cleaning and prepping the wall surface. Next, measure and cut the sheets to fit your space. Carefully peel off the backing, then press the sheets onto the wall, ensuring they are aligned correctly. Use a firm, even pressure to smooth out any air bubbles. That’s it! You’ve just given your kitchen or bathroom a stunning facelift in a matter of hours.
The removal process is equally hassle-free. If you’re renting or planning to change your décor, these backsplashes won’t leave any sticky residue or damage your walls. Warm the adhesive with a hairdryer, and gently peel off the sheets. Your walls will remain as good as new.
Temporary Wallpaper
Temporary wallpaper offers an exciting and budget-friendly way to give your walls a fresh look. We’ll delve into the benefits of using temporary wallpaper and guide you
through choosing the perfect design and applying it flawlessly.
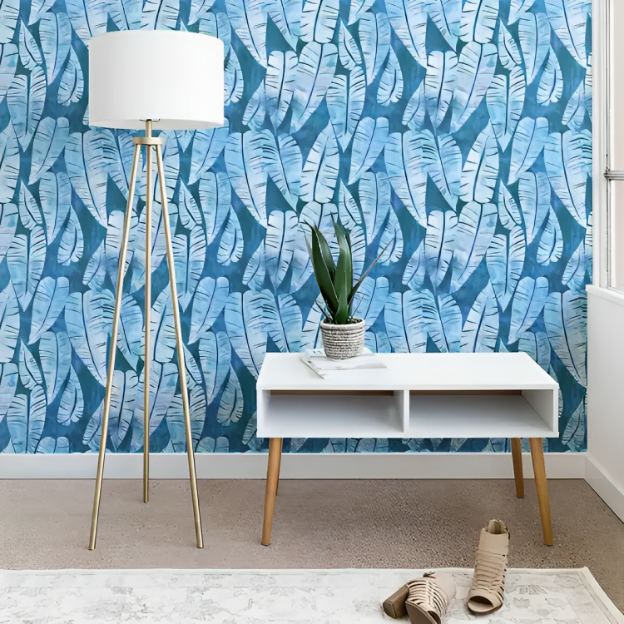
Temporary wallpaper is a versatile and cost-effective way to transform your living space. It comes in many designs, from classic to contemporary, making it easy to find something that suits your taste. Whether you want to add a burst of colour, a touch of elegance, or a bold statement to your walls, temporary wallpaper provides the perfect solution.
The application process is straightforward. Start by measuring your walls and cutting the wallpaper to size. If the design is intricate, you may need to match patterns for a seamless look. Most temporary wallpapers have a peel-and-stick backing, making it simple to apply. Remove the backing, align the paper with your wall, and smooth it out. It’s like a giant, beautiful sticker for your walls. Plus, it’s easy to reposition during application to get it just right.
Removing temporary wallpaper is a breeze when it’s time for a change or if you’re moving. Start at a corner and peel it off gently. Unlike traditional wallpaper, it won’t leave a sticky residue or damage the underlying wall. You’re left with a clean slate, ready for your next design adventure.
Paint Pour Art l
Art is a powerful means of self-expression, and paint-pour art is a mesmerizing form of creative expression. This section will explore the world of paint pour art, ensuring that both beginners and experienced artists can enjoy this unique art form.
What is Paint Pouring?
We’ve got you covered if you’re new to painting or art. We’ll explain the fundamentals, including the materials and tools you’ll need to get started. Additionally, we’ll touch on the history and inspiration behind this creative art form, setting the stage for your artistic journey.
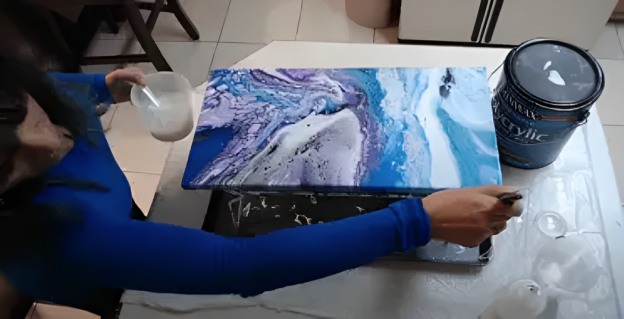
Paint pouring, or fluid art, is a fascinating and dynamic way to create stunning abstract pieces. It involves mixing acrylic paint with various pouring mediums to achieve a fluid consistency. This allows the paint to flow and interact, creating unique patterns and designs. The result is often a captivating blend of colours and shapes that are visually striking and open to interpretation.
You’ll need a few essential materials to embark on your paint-pouring journey. Firstly, you’ll require acrylic paint in the colours of your choice. You’ll also need a pouring medium to adjust the paint’s consistency, making it suitable for pouring. Some common pouring mediums include floral, pouring medium, or a mixture of glue and water.
Additionally, you’ll need a surface to pour your paint onto. Canvas is a popular choice, but you can use other surfaces like wood, ceramic, or glass. To create striking effects, consider using various pouring techniques, such as the flip cup, swipe, or dirty pour.
Step-by-Step Tutorial
To help you master the art of paint pouring, we’ll provide a comprehensive step-by-step tutorial. Each stage of the process will be detailed, accompanied by images for visual guidance, ensuring your artistic journey is as smooth as possible.

1. Preparation: Lay out all your materials and protect your work surface with plastic or a drop cloth. Place your canvas or chosen surface on a raised platform, like plastic cups or bottle caps, to allow the excess paint to drip off the edges.
2. Mixing the Paint: In individual cups, mix your acrylic paint with the pouring medium of your choice. You want the paint to be a similar consistency to warm honey. Stir thoroughly to avoid lumps.
3. Layering the Colors: Layering your mixed paints in one cup or container. You can pour the colours in any order, creating a unique blend. You can also create multiple cups with different colour combinations.
4. Pouring the Paint: Now comes the exciting part. Flip the cup onto the centre of the canvas and lift it slowly to let the paint flow out. You can tilt the canvas to spread the paint and create the desired patterns.
5. Touch-Ups: After the initial pour, you can use a palette knife or a straw to adjust and manipulate the paint to create specific effects.
6. Drying and Sealing: Let your masterpiece dry on a level surface for at least 24 hours. Once completely dry, apply a sealant or varnish to protect the artwork and enhance its vibrancy.
7. Display Your Art: Now that your paint-pour art is complete, it’s time to showcase your creativity. Frame it, hang it on your wall, or give it as a unique and personalized gift to someone special.
Holiday Decor DIY
The holiday season is a time for warmth, love, and joy, and there’s no better way to embrace it than by crafting your holiday decorations.

Handmade Ornaments
Handmade ornaments are not only charming but also deeply personal. This subsection will present various ideas, materials, and techniques to help you create your unique ornaments. We’ll encourage you to infuse your ornaments with your style, making them unique.
The holidays are a magical time filled with joy and cherished traditions. One of the most beloved traditions is decorating the tree, and what better way to add a personal touch than with handmade ornaments? Handmade ornaments reflect your creativity and hold sentimental value, making them extra special. Here are some fantastic ideas to get you started on your ornament-making journey.
➔ Salt Dough Ornaments:

Salt dough ornaments are a classic and easy DIY project. You’ll need simple ingredients from your kitchen:
1. Salt, flour, and water.
2. Mix these to create a dough that can be rolled out and cut into various shapes.
3. Use cookie cutters to achieve your desired shapes, and remember to make a small hole for hanging. Once your ornaments are baked and cooled, you can paint them with acrylic paints, add glitter, or even embellish them with sequins for a sparkling finish.
4. Finish off with a ribbon for hanging.
➔ Photo Ornaments:

Photo ornaments are an excellent way to relive precious memories during the holiday season. Gather some clear, plastic ornaments, and carefully insert small, trimmed photos. Add a pinch of fake snow or glitter inside for a festive touch. Seal the ornament, and it’s ready to hang on your tree.
➔ Pinecone Ornaments:

If you want a natural and rustic touch, consider creating pinecone ornaments. Collect pinecones from your yard or a nearby park, and clean them thoroughly. Once dry, you can dip the tips in white paint to mimic snow or add a touch of gold or silver for some glamour. Attach a ribbon loop to the top, and you’re ready to hang these charming ornaments on your tree.
➔ Felt Ornaments:

➔ Mason Jar Lid Ornaments:

Mason jar lids can be repurposed into charming ornaments. Begin by painting the lids with festive colours and designs. You can create snowmen, reindeer, or even holiday scenes. Glue a small picture hook or ribbon loop to the back for hanging. These unique ornaments add a touch of rustic charm to your tree.
Wreaths and Garlands
Wreaths and garlands add a touch of elegance to any space during the holiday season. We’ll guide you through crafting these beautiful decorations, offering detailed instructions, suggesting different designs, and inspiring images.
Wreaths
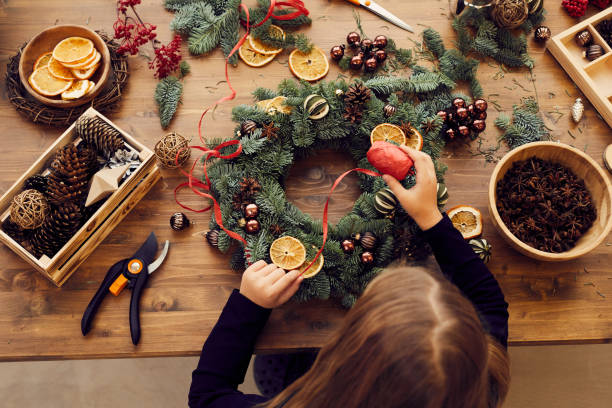
Wreaths are timeless, versatile decorations that grace your front door, windows, or walls. Creating your wreaths allows you to tailor them to your style and colour scheme. Here are a few ideas to get you started:
● Traditional Pine Wreath: A classic pine wreath is a timeless addition to your holiday décor. You can purchase a pre-made pine wreath or gather pine branches and attach them to a wire wreath form. Add festive embellishments like red berries, pine cones, and a bow for a traditional look.
● Burlap Wreath: Burlap wreaths offer a rustic and cosy feel. To create one, gather burlap ribbon or fabric, a wire wreath frame, and some decorative elements like faux flowers, berries, or ornaments. Attach burlap loops to the frame and add decorations for a charming burlap wreath.
● Holiday Ball Wreath: A holiday ball wreath is a delightful and unique decoration. To craft one, you’ll need a foam wreath form and a variety of small ornaments in your preferred colours. Use hot glue to attach the ornaments to the wreath form, covering it entirely for a festive, eye-catching look.
● Gingerbread Wreath: A gingerbread wreath adds a touch of whimsy to your holiday décor. You’ll need gingerbread-shaped ornaments, faux icing, and colourful candy embellishments to create this sweet decoration. Attach the ornaments to a wire wreath frame, and use the faux icing to create the illusion of gingerbread cookies.
● Winter Wonderland Wreath: A winter wonderland wreath captures the serene beauty of the season. Begin with a plain evergreen wreath and add elements like faux snow, pine cones, and small bird ornaments. A dusting of white spray paint or glitter can add a frosty touch. This wreath evokes the tranquil charm of a snowy landscape.
Garlands

Garlands are another festive way to decorate your home during the holidays. You can drape them on mantels and staircases and use them as table runners. Crafting your lands allows you to customize the length and design to suit your space.
- Cranberry and Popcorn Garland: A cranberry and popcorn garland is a classic, charming addition to your holiday décor. To make overconcerned cranberry, combine popped popcorn, a needle, and strong getting to make one added cranberry to create a beautiful and traditional garland.
- Pine Cone Garland: Pine cones add a natural and rustic touch to your holiday decorations. To make a pine cone garland, collect pine cones and attach a string to the base of each cone. For a festive look, intersperse them with greenery, holly berries, or colourful ribbons.
- Paper Snowflake Garland: A paper snowflake garland is a delicate and whimsical decoration. Create your snowflakes from white paper using a simple folding and cutting technique. Attach them to a string, leaving spaces between each snowflake. This garland looks beautiful hanging across windows or as a charming addition to your holiday table.
- Felt Ball Garland: Felt ball garlands are colourful and eye-catching to your holiday decorations. You can purchase pre-made felt balls or create your betting and rolling colourful felt. Thread the balls onto a string in your preferred colour pattern. This garland adds a touch of fun to any holiday setting.
- Gingerbread Garland: A gingerbread garland offers a delicious and whimsical touch to your holiday decorations. To make one, create gingerbread-shaped ornaments using brown felt or cardboard. Attach a string to each gingerbread person and hang them in a delightful line.
Conclusion
In this article, we’ve embarked on a journey to infuse your living space with creativity, personal style, and a festive spirit. We began by exploring the world of rental-friendly upgrades, delving into the magic of peel-and-stick backsplashes and temporary wallpaper, transforming your spaces with ease and style. Next, we dove into the mesmerizing art of paint pour art, from understanding the basics to creating your stunning masterpieces.
Then, we ventured into the holiday season with a joyful array of DIY holiday decorations. Handmade ornaments allow you to cherish and share precious memories, while wreaths and garlands bring a touch of elegance and warmth to your living spaces. These DIY projects add personal touches and create lasting memories for you and your loved ones.
In this season of celebration and togetherness, there’s no better way to make your living space truly yours than by indulging in these creative projects. The benefits are numerous – from personalization and budget-friendliness to the sense of accomplishment that comes with crafting something beautiful. So, why wait? Dive into these projects and let your creativity shine, transforming your living space one DIY project at a time.
Review Title
There are many variations of passages of Lorem Ipsum available, but the majority have suffered alteration in some form, by injected humour, or randomised words which don't look even slightly believable. If you are going to use a passage of Lorem Ipsum, you need to be sure there isn't anything embarrassing hidden in the middle of text.If you use this site regularly and would like to help keep the site on the Internet, please consider donating a small sum to help pay for the hosting and bandwidth bill. There is no minimum donation, any sum is appreciated - click here to donate using PayPal. Thank you for your support.