Floating shelves are one of the easiest ways to add storage and style to any room. They’re clean, modern, and look like something you’d find in a high-end home—but the best part? You can make them yourself in just a couple of hours. This beginner-friendly tutorial walks you through every step so you can create beautiful shelves that look professionally installed.
Start by gathering your materials: a wooden board cut to your desired length, a floating shelf bracket, screws, a stud finder, a drill, sandpaper, and paint or stain. Choose wood that fits your style—pine for a rustic look, poplar for a smooth paint finish, or oak for a more elevated design.
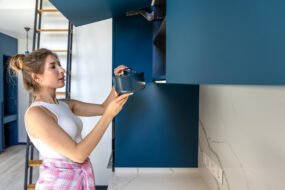
Begin by marking where you want your shelf to go. Use a level to ensure your lines are straight. Then, use a stud finder to locate studs in the wall. Mounting your shelf brackets into studs is essential for strength, especially if you plan to store books, plants, or décor.
Next, install the bracket using your drill and screws. Make sure it’s tightly secured. Then prepare your wooden board by sanding the edges and surface until smooth. Apply your chosen stain or paint and let it dry completely.
Once dry, slide the shelf onto the bracket. If your bracket requires locking screws, tighten them to secure the shelf. Step back and admire your new floating shelf—stylish, sturdy, and completely DIY.
This simple project is perfect for bathrooms, kitchens, bedrooms, entryways, or adding personality to blank walls. The best part? You can make multiple shelves for a cohesive, customized look.