Introduction: Transform Your Space in Just a Weekend
Your walls are more than boundaries — they’re blank canvases waiting for personality. Whether you live in a cozy studio or a spacious family home, a single accent wall can redefine your space.
Here’s the best part — you don’t need a contractor or a massive budget. With a few tools, a splash of creativity, and a free weekend, you can turn any plain wall into a statement piece that reflects you.
From peel-and-stick panels to paint tricks and recycled materials, let’s explore simple, affordable, and stunning DIY accent wall ideas that you can start this weekend.
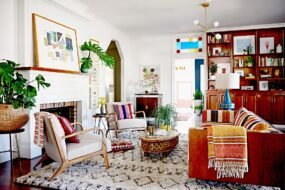
Section 1: Why Accent Walls Matter
Accent walls are the heart of modern design. They:
- Add depth and dimension to rooms
- Highlight architectural features
- Create visual balance
- Allow bold expression without overpowering your space
Think of it as giving your room a “wow” moment — one wall that instantly draws attention and ties everything together.
Section 2: Choosing the Perfect Wall
Before diving in, choose wisely. The right wall should be the natural focal point of your room — maybe the wall behind your bed, sofa, dining table, or TV.
Ask yourself:
- Where does my eye go first when I enter the room?
- What background will complement my furniture?
- Is there natural light to highlight textures or patterns?
Once you’ve got that wall picked, the fun begins.
Section 3: Paint Magic — Patterns & Color Blocking
1. Geometric Color Blocking
You don’t need wallpaper to make a statement. Use painter’s tape to create geometric patterns — triangles, diagonals, or asymmetrical shapes.
- Choose 2–3 complementary colors.
- Paint one shape at a time, letting each dry before removing tape.
- Finish with a matte or satin seal for durability.
DIY Tip: Try combining muted tones (like sage and cream) with a pop color (like mustard or navy).
2. Ombre Effect
Create a gradient look by blending one color into another from dark to light. Start from the baseboard upward using a dry roller and soft brush blending technique.
Perfect for: Bedrooms, bathrooms, or relaxation spaces.
Section 4: Wood-Inspired Accent Walls
1. Reclaimed Wood Panels
Rustic yet warm — this look adds natural character. Collect old pallets or wood planks, sand them down, and stain them in various shades before attaching them horizontally or vertically.
- Use adhesive + nails for extra security.
- Mix stains for a multi-toned finish.
2. DIY Board and Batten
Add instant sophistication with wood strips (battens) and paint.
Steps:
- Measure and mark vertical lines.
- Attach thin wood strips using nails or adhesive.
- Fill gaps with caulk and paint everything one color.
Style tip: Use deep hues like charcoal, forest green, or navy for drama.
3. Slat Wall
Minimal, modern, and stylish. Cut thin wooden slats, stain or paint them, and mount them with equal spacing using a level.
Great for entryways or behind a TV unit.
Section 5: Peel-and-Stick Perfection
When you want instant transformation, peel-and-stick wallpaper or tiles are your best friend.
1. Textured Wallpaper
Try faux brick, marble, or linen textures — they add visual depth without mess.
Pro Tip: Use a smoothing tool to remove air bubbles and ensure edges are straight.
2. Peel-and-Stick Wood Panels
Available in lightweight materials that mimic real wood, perfect for renters or those avoiding power tools.
3. Pattern Play
Go bold with geometric or floral prints. A single wall of pattern can redefine an entire room’s vibe.
Section 6: Paint & Texture Combos
Combine paint with texture for a truly artistic wall.
1. Sponge Painting
Use a damp sponge to dab a contrasting color over a dry base coat for a subtle texture.
2. Stucco or Limewash
Apply with a wide brush or trowel to create a cloudy, organic texture. The result? A timeless, European-inspired aesthetic.
3. Metallic Finishes
Add shimmer by brushing metallic glaze over matte paint. Try gold, copper, or silver accents for a luxurious glow.
Section 7: Creative Material-Based Walls
1. Fabric Panels
Staple fabric panels or upholstery foam boards directly onto your wall for a soft, acoustic, and elegant look.
2. Cork Wall
Perfect for home offices or craft rooms — functional and stylish. You can pin notes, photos, and ideas while adding warmth.
3. Mirror Mosaic
Break old mirrors (safely), polish the edges, and glue pieces onto your wall in a random or geometric design. Adds depth and brightness instantly.
Section 8: Wall Art That Is the Wall
Why hang art when you can create it on your wall?
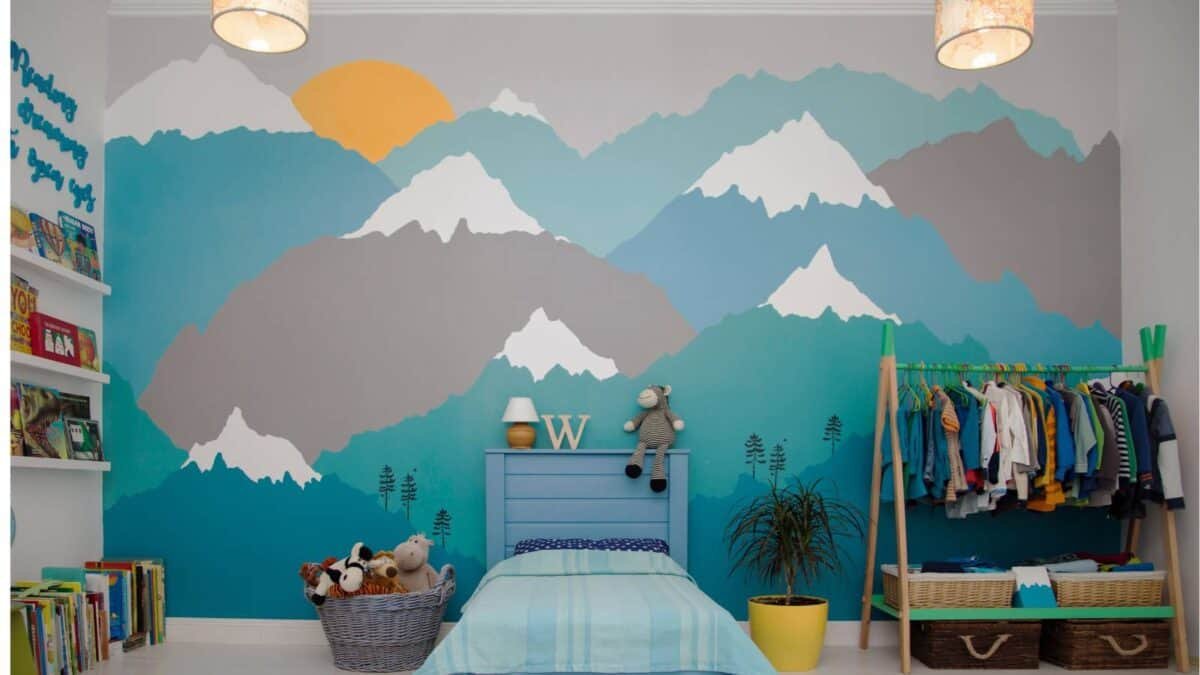
1. Hand-Painted Murals
Sketch your design lightly with chalk, then paint freehand. Don’t aim for perfection — DIY charm shines through personality.
2. Stencil Art
Stencil designs are perfect for beginners. Use pre-cut patterns of florals, mandalas, or geometric shapes.
3. Washi Tape Art
Removable, colorful, and renter-friendly. Outline frames, shapes, or patterns directly with washi tape.
Section 9: Light It Right
Lighting makes or breaks your wall. Consider:
- Sconces or strip LEDs to highlight texture.
- Spotlights on art walls.
- Warm fairy lights for cozy bedroom vibes.
DIY Tip: Use motion-sensor or USB LED strips behind furniture for a soft ambient glow.
Section 10: Finishing Touches & Styling
Once your wall is complete, style around it to amplify its impact:
- Keep furniture simple to let the wall stand out.
- Add plants for contrast and texture.
- Use complementary decor tones — repeat colors or textures subtly around the room.
Section 11: Budget Breakdown
| Project | Estimated Cost | Difficulty |
|---|---|---|
| Paint & Tape Design | $30–$80 | Beginner |
| Board & Batten | $60–$120 | Intermediate |
| Peel-and-Stick Wallpaper | $40–$100 | Beginner |
| Reclaimed Wood Wall | $80–$150 | Intermediate |
| Slat Wall | $70–$130 | Intermediate |
| Fabric Panels | $50–$100 | Beginner |
| Limewash Finish | $40–$80 | Beginner |
Section 12: Maintenance & Longevity
- Dust and clean regularly using a soft cloth.
- Avoid harsh cleaners on textured or wood walls.
- Touch up paint yearly to keep colors fresh.
- For removable wallpapers, peel gently and replace seasonally.
Section 13: Weekend Project Planner
Friday Night: Gather tools and materials, clear your space.
Saturday: Prep the wall — clean, sand, and tape off.
Sunday: Paint, install, style, and photograph your masterpiece!
You’ll have a completely refreshed room by Sunday evening — no renovation crew required.
Conclusion: Your Walls, Your Canvas
Accent walls aren’t about trends — they’re about self-expression. Each brushstroke, each slat, each texture you add is a reflection of your creativity.
With just a weekend of effort and imagination, you can transform your home into a space that feels truly yours.
So grab that tape measure, pick your palette, and let your walls tell your story — one DIY project at a time.