DIY (Do It Yourself) projects have become a popular way to add a personal touch to your home, create unique gifts, and unleash your creativity. Whether you’re a complete beginner or an experienced crafter, there’s something immensely satisfying about completing a DIY project on your own. The best part? DIY doesn’t have to be complicated. There are countless easy and fun projects that anyone, regardless of their skill level, can master with the right step-by-step instructions.
In this post, we’ll dive into several step-by-step DIY tutorials that cover a range of skills and project types, from home decor to gifts and organizational solutions. By the end, you’ll have plenty of new ideas to try, and you’ll be well on your way to mastering the craft. So, grab your tools, unleash your creativity, and let’s get started!
1. DIY Macramé Wall Hanging for Beginners
Macramé is a beautiful craft that uses knotting techniques to create intricate and textured designs. It’s a relaxing and therapeutic activity that’s perfect for beginners. Plus, macramé wall hangings add a touch of bohemian charm to any room in your home.
Materials Needed:
- Macramé cord (about 3mm thickness)
- Wooden dowel or branch (for hanging)
- Scissors
- Tape measure
Step-by-Step Instructions:
- Measure and Cut the Cord: Start by cutting several lengths of macramé cord. For a medium-sized wall hanging, cut around 8-10 pieces, each about 4 feet long.
- Attach Cords to the Dowel: Fold each piece of cord in half and attach it to the wooden dowel using a Lark’s Head Knot (fold the cord in half, place the loop over the dowel, and pull the ends through the loop).
- Create the Design: Once your cords are attached, begin working on the knotting patterns. Start with Square Knots (left side over right, right side over left, and pull tight) for a simple design.
- Add Layers: As you progress, experiment with different knots such as Half Square Knots, Lark’s Head, or Double Half Hitch to add texture and visual interest.
- Trim and Finish: When you’re happy with the design, trim the cords to your desired fringe length, and you’re done!
This project is ideal for those new to macramé, and you’ll soon have a stylish wall hanging that adds texture and warmth to any space.
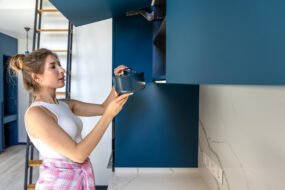
2. Upcycled Glass Jar Storage Containers
Transforming old glass jars into functional storage containers is a practical and eco-friendly DIY project. This tutorial is perfect for beginners and will help you repurpose something you might otherwise throw away.
Materials Needed:
- Glass jars (old jam jars, mason jars, etc.)
- Spray paint or acrylic paint
- Ribbon, twine, or fabric (optional)
- Hot glue gun (optional)
Step-by-Step Instructions:
- Clean the Jars: Begin by cleaning and removing labels from the glass jars. Use warm soapy water to get rid of any adhesive residue.
- Paint the Jars: Once dry, spray paint the jars in your desired color. You can use a single color or get creative with patterns. If using acrylic paint, be sure to use multiple coats to ensure even coverage.
- Decorate (Optional): Once the paint is dry, you can further decorate the jars. Wrap twine or ribbon around the neck of the jar, or use fabric to make decorative lids.
- Fill the Jars: Use these upcycled jars to organize small items around your home, such as office supplies, buttons, or craft materials. You can also add labels to make them even more functional.
These upcycled jars are a great way to add rustic charm to your home while keeping things organized. They also make wonderful homemade gifts!
3. DIY Rope Basket for Storage
This easy-to-follow rope basket project is perfect for organizing your home while adding a touch of rustic style. It’s also an excellent beginner-friendly project that involves basic sewing skills.
Materials Needed:
- Cotton rope (about 100 feet)
- Sewing machine or needle and thread
- Hot glue gun
- Scissors
Step-by-Step Instructions:
- Create the Base: Start by coiling the rope into a small circle, about 6-8 inches in diameter. This will be the base of your basket.
- Sew the Rope: Use your sewing machine or needle and thread to stitch the rope together as you continue to coil it. Make sure the stitches are close together to keep the rope from unwinding.
- Build the Sides: Once the base is complete, begin coiling the rope upward, sewing as you go. To create a clean, round shape, occasionally pull the coil tighter or loosen it, depending on the curve you want.
- Finish the Basket: Once your basket reaches the desired height, cut the rope, and stitch the end securely. Use hot glue to add finishing touches, such as attaching handles made of twine or ribbon.
This rope basket is a functional and stylish way to store everything from toys and blankets to magazines and craft supplies.
4. DIY Terrarium with Succulents
Terrariums are low-maintenance indoor gardens that bring nature into your home. They’re a perfect DIY project for plant lovers and can be easily customized to suit any style or space. This tutorial is simple enough for beginners but allows for plenty of creativity in the design.
Materials Needed:
- Glass container (a fishbowl, vase, or mason jar)
- Small pebbles or rocks
- Activated charcoal (to prevent mold)
- Potting soil
- Succulent plants
- Decorative items (moss, shells, small figurines)
Step-by-Step Instructions:
- Prepare the Container: Start by adding a layer of small pebbles or rocks at the bottom of your glass container. This helps with drainage and prevents the soil from becoming waterlogged.
- Add Activated Charcoal: Add a thin layer of activated charcoal on top of the rocks to help filter the water and prevent odors.
- Add Potting Soil: Pour a layer of potting soil into the container, leaving enough room for the plants.
- Plant Your Succulents: Gently remove the succulents from their pots and place them into the soil. Arrange them in a visually appealing way, leaving space for growth.
- Decorate (Optional): Add moss, pebbles, or small figurines to enhance the aesthetic of your terrarium.
- Water and Care: Lightly water your succulents and place your terrarium in a location with bright, indirect sunlight.
This is a simple and enjoyable DIY project that will brighten up your home and introduce a little greenery to your decor.
5. DIY Candle Holder from Wood Slices
Wood slices are a fantastic material for rustic home decor, and turning them into DIY candle holders is an easy project that adds warmth and charm to any room.
Materials Needed:
- Wood slices (about 3-5 inches in diameter)
- Tea light candles or small votive candles
- Drill and drill bits (appropriate size for your candles)
- Sandpaper
- Optional: paint or wood stain
Step-by-Step Instructions:
- Prepare the Wood Slices: Sand the edges and surface of your wood slices to smooth out any rough spots.
- Drill Holes: Using a drill with the appropriate drill bit, carefully drill a hole in the center of each wood slice. The hole should be just large enough to hold your tea light or votive candles snugly.
- Finish the Wood (Optional): If you prefer a more polished look, you can stain or paint the wood slices before drilling. A light coat of polyurethane will also protect the surface.
- Insert the Candles: Place a candle in each hole. The wood will add a rustic and cozy ambiance to any space.
These DIY candle holders make excellent centerpieces for a dining table or a warm addition to any coffee table.
6. Customized Picture Frame with Twine and Clips
A picture frame with a personal touch is a great way to display your favorite photos. This project is quick, easy, and can be customized with various materials, making it a fun craft for all skill levels.
Materials Needed:
- Wooden picture frame (any size)
- Twine or string
- Small clothespins or binder clips
- Hot glue gun
- Scissors
Step-by-Step Instructions:
- Prepare the Frame: Remove the backing from the picture frame and clean it to ensure it’s free of dust.
- Attach the Twine: Using a hot glue gun, attach lengths of twine horizontally across the frame, ensuring they are taut. Leave enough space between the twine to allow for the pictures to be clipped.
- Clip the Photos: Use small clothespins or binder clips to attach your favorite photos to the twine. This makes it easy to swap out pictures when you want to update your display.
- Hang Your Frame: Once the photos are in place, hang your frame on the wall, or place it on a mantle or shelf.
This DIY project adds a personal and rustic touch to your home and lets you switch out photos easily, perfect for a family gallery or showcasing your travels.
7. Hand-Painted Flower Pots
Flower pots are a simple and inexpensive way to brighten up your space, and painting them yourself allows you to create a completely personalized look. These hand-painted pots can be used to hold flowers, plants, or even just decorative branches.
Materials Needed:
- Terracotta flower pots
- Acrylic paint (variety of colors)
- Paintbrushes (various sizes)
- Paint palette
- Sealant (optional)
Step-by-Step Instructions:
- Prep the Pots: Begin by cleaning the flower pots to remove any dirt or dust.
- Paint the Base: Use a paintbrush to cover the pot in your base color. You can use a solid color or create stripes, dots, or other designs.
- Add Decorative Elements: Once the base coat is dry, add patterns, flowers, or other creative details with smaller brushes.
- Seal the Paint: If you want your pots to last longer, apply a clear acrylic sealant once the paint is dry to protect the design.
- Add Plants: Once your pots are dry, add plants, and enjoy your vibrant new decor!
Hand-painted flower pots are a fantastic way to showcase your personality while adding a pop of color to your home.
Conclusion
DIY projects are an excellent way to tap into your creativity, personalize your space, and save money. Whether you’re a beginner or an experienced crafter, the step-by-step tutorials shared above will help you complete a variety of fun and functional DIY projects. From macramé wall hangings to hand-painted flower pots, there’s something for everyone.
So, pick a project, gather your materials, and start crafting today! With each completed project, you’ll gain confidence and new skills, while also transforming your home into a reflection of your personal style. Happy crafting!