Your home is a reflection of your personality and style, but creating a space that feels both beautiful and functional doesn’t have to cost a fortune. DIY décor and design are fantastic ways to personalize your living spaces without breaking the bank. With a little creativity, some basic tools, and affordable materials, you can transform every room in your home into a stylish sanctuary.
In this post, we’ll explore 10 creative DIY décor and design ideas that you can try in every room of your home. Whether you’re looking to refresh your living room, add character to your kitchen, or create a cozy vibe in your bedroom, these DIY projects are sure to inspire your inner designer.
1. DIY Accent Wall with Peel-and-Stick Wallpaper
Accent walls are a great way to add personality and depth to any room. However, traditional paint jobs can be time-consuming and costly. Instead, why not use peel-and-stick wallpaper? It’s an easy and inexpensive way to create a statement wall without the hassle.
Materials Needed:
- Peel-and-stick wallpaper (available in various patterns and textures)
- Measuring tape
- Scissors or a utility knife
- Smoothing tool or a credit card
How to Get Started:
- Choose Your Pattern: Look for peel-and-stick wallpaper in a pattern or design that complements your existing décor. From geometric shapes to floral prints, there are endless options.
- Measure the Wall: Use a measuring tape to determine how much wallpaper you’ll need. Cut your wallpaper to the correct size before applying it to the wall.
- Apply and Smooth: Start at one corner of the wall and peel the backing off, applying the wallpaper in sections. Use a smoothing tool or credit card to eliminate bubbles and creases.
This DIY accent wall is a fast and impactful way to refresh your space, and you can easily change the design if you want a new look in the future.
2. Create a Boho Macramé Wall Hanging
Macramé wall hangings are an iconic addition to boho-inspired interiors. They add texture, warmth, and a handmade touch to any space. And the best part? You don’t need to be an expert crafter to create a beautiful macramé piece.
Materials Needed:
- Macramé cord (available at most craft stores)
- Wooden dowel or branch
- Scissors
- A tape measure
How to Get Started:
- Cut the Cord: Measure out your cords based on the size of the wall hanging you want to create. For a basic design, cut cords that are 4-6 feet long.
- Tie Knots: Use basic macramé knots like square knots, lark’s head knots, and half-hitches to create your design. You can find easy-to-follow tutorials online to guide you through different knotting techniques.
- Hang Your Piece: Once you’re finished with the design, simply tie the cords to the dowel or branch and hang your macramé piece on the wall.
This project is perfect for adding some texture and personality to a bedroom, living room, or even a hallway. It’s a relaxing, creative project that brings bohemian charm to your home.
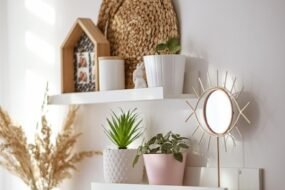
3. Custom Floating Shelves
Floating shelves are a sleek and modern way to display books, plants, and decor. Creating your own custom floating shelves is not only cost-effective but also allows you to tailor the design to your exact needs and style.
Materials Needed:
- Wood planks (your choice of size and wood type)
- Brackets (optional, for added support)
- Screws and a drill
- Sandpaper or a sanding block
- Wood stain or paint (optional)
How to Get Started:
- Measure and Cut: Decide how long you want your shelves to be. Cut the wood planks to the desired length, then sand the edges to smooth them out.
- Prepare the Wall: Use a level and measuring tape to mark where you want the shelves to go. If you’re not using brackets, you may need to install a mounting system or support cleat.
- Install the Shelves: Drill holes into the wall at your marked locations, then secure the shelves to the wall with screws. For a more polished look, you can paint or stain the wood before installing.
Floating shelves are a stylish and functional addition to any room, whether you’re displaying books in the living room, toiletries in the bathroom, or plants in the kitchen.
4. DIY Industrial Pipe Curtain Rods
If you love the industrial look, why not incorporate it into your home décor with DIY industrial pipe curtain rods? These rods are easy to make, customizable, and will give your windows a modern, industrial vibe.
Materials Needed:
- Black steel pipes (available at most hardware stores)
- Pipe flanges
- Pipe elbows (optional)
- Curtain rings
- Screws and a drill
- Wall anchors
How to Get Started:
- Measure the Length: Measure the width of your window to determine the length of the pipe you need for your curtain rod.
- Assemble the Rod: Attach the pipe flanges to both ends of the pipe to create the mounting points. You can use pipe elbows for a more decorative, industrial look if desired.
- Mount to the Wall: Use a drill to attach the pipe flanges to the wall with screws and anchors. Then, slide your curtains onto the rod and hang them up.
This industrial-style curtain rod is perfect for creating a focal point in a room while adding a rugged, contemporary flair.
5. DIY Geometric Painted Floor Rug
Adding a custom rug to a room can dramatically change the atmosphere, but buying high-quality rugs can be pricey. Instead, why not create your own? With a bit of paint and creativity, you can make a geometric-painted floor rug that is both stylish and budget-friendly.
Materials Needed:
- Drop cloth or canvas fabric
- Painter’s tape
- Acrylic paint in your desired colors
- Foam roller or paintbrushes
- Scissors
How to Get Started:
- Cut the Fabric: Measure and cut your drop cloth or canvas to the size of your desired rug.
- Tape the Design: Use painter’s tape to create geometric shapes or patterns on the rug. Be creative with your design—try stripes, triangles, or bold shapes.
- Paint: Using acrylic paint, fill in the taped-off sections. Let each color dry before moving on to the next. Once the paint is completely dry, remove the tape to reveal your pattern.
- Seal the Rug: If you want the rug to last longer, you can apply a fabric sealer or top coat to protect the paint.
This rug is an affordable and fun DIY project that brings a touch of personalization and pattern to your space.
6. Repurposed Pallet Coffee Table
Wooden pallets are inexpensive and can be repurposed into stylish furniture pieces. A pallet coffee table is a functional and rustic addition to any living room. You can customize it with paint, stain, or even wheels to give it a unique touch.
Materials Needed:
- Wooden pallets (one or two, depending on size)
- Sandpaper
- Paint or wood stain (optional)
- Casters or furniture legs (optional)
- Screws and a drill
How to Get Started:
- Prepare the Pallet: Sand down the pallet to remove any rough edges or splinters.
- Stain or Paint: If you want a more polished look, apply a wood stain or paint the pallet in your preferred color. Let it dry completely.
- Attach Casters or Legs: If you want to add wheels for mobility, attach casters to the bottom of the pallet. Alternatively, you can add furniture legs for a more traditional look.
- Assemble: Once everything is dry, place the pallet where you want it in your living room. You can add a glass or wood top for a smoother surface.
This upcycled coffee table is a perfect way to bring a rustic touch to your home while reusing materials in a creative way.
7. Personalized Picture Frame Wall
A personalized picture frame wall is a great way to display family photos, art, or prints. Instead of purchasing pricey frames, create your own from inexpensive materials, like old wood, scrap fabric, or even cardboard.
Materials Needed:
- Scrap wood, cardboard, or frames you no longer use
- Paint, fabric, or paper for decoration
- Hot glue gun or screws for mounting
- Hanging hardware
How to Get Started:
- Create the Frames: Cut scrap wood or cardboard into the size of the frames you want. If you’re using wood, you can paint it or stain it for a rustic finish. For cardboard, use decorative paper or fabric to cover the surface.
- Mount the Photos: Attach photos, artwork, or prints to the frames using adhesive or a glue gun.
- Arrange on the Wall: Once all the frames are ready, arrange them on the wall in a grid, gallery style, or randomly for a more organic look. Attach hanging hardware to the back of each frame.
A personalized picture frame wall brings life and personality to a space, making it feel uniquely yours.
8. DIY Potted Plant Stand
If you’re a plant lover, you know that displaying plants can sometimes be tricky. A simple DIY plant stand is an affordable and stylish way to showcase your indoor plants while keeping them organized.
Materials Needed:
- Wooden dowels or small wooden planks
- Saw (if necessary)
- Screws or wood glue
- Paint or stain (optional)
How to Get Started:
- Create the Stand Frame: Depending on the size of the plant stand you want, cut your wood pieces to the desired lengths. For a tiered design, you can create multiple levels using wooden dowels or planks.
- Assemble the Stand: Attach the pieces together using screws or wood glue to create a stable frame. Make sure the stand is level before securing everything in place.
- Paint or Stain: To match your décor, paint or stain the plant stand in your preferred color.
This DIY project adds a natural and elegant touch to your living space, giving your plants a home while adding height and dimension to the room.
9. DIY Fabric Headboard for the Bedroom
A statement headboard can completely transform your bedroom, but buying a high-quality one can be expensive. Fortunately, making your own fabric headboard is easier than you think.
Materials Needed:
- Plywood or MDF board
- Foam padding (optional for extra comfort)
- Fabric (choose a durable, stylish fabric)
- Staple gun and staples
- Upholstery nailhead trim (optional)
How to Get Started:
- Cut the Board: Cut the plywood or MDF to the width of your bed. You can adjust the height based on how tall you want the headboard to be.
- Attach Foam Padding: For extra comfort and a plush look, attach foam padding to the plywood using a staple gun.
- Cover with Fabric: Lay your fabric out, then wrap it tightly around the board, securing it with a staple gun at the back.
- Add Nailhead Trim: If desired, use upholstery nails along the edges for a stylish, finished look.
- Mount the Headboard: Attach the headboard to your bed frame using screws or brackets.
This DIY project not only enhances your bedroom’s aesthetic but also saves you money compared to buying a pre-made headboard.
10. Upcycled Glass Jar Lighting
Repurposing glass jars into light fixtures is a creative and budget-friendly way to add ambiance to any room. You can turn mason jars, wine bottles, or even old lightbulbs into beautiful light sources.
Materials Needed:
- Glass jars, bottles, or lightbulbs
- String lights or small bulbs
- Drill with glass bit (optional)
- Twine or hanging chain (for hanging lights)
How to Get Started:
- Drill Holes (if needed): If you’re using jars or bottles, drill a small hole at the top for the string lights to pass through. Be sure to use a drill bit designed for glass.
- Insert the Lights: Thread the string lights or place small bulbs into the jars or bottles.
- Hang or Place: You can hang the jars from the ceiling using twine or a chain or place them on shelves or tables for an elegant touch.
This lighting project is an easy and eco-friendly way to add a warm glow to your home.
Conclusion
DIY décor and design projects are an excellent way to personalize your living space without spending a lot of money. From creating your own accent walls and furniture to adding unique touches with upcycled materials, these 10 creative projects can help elevate any room in your home. With a little time, effort, and imagination, you can turn your house into a stylish and welcoming haven.
So, pick up your tools, gather your materials, and start crafting your way to a more beautiful home today!