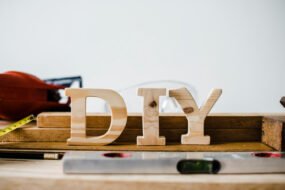
Whether you’re a seasoned DIY enthusiast or just getting started, there are always ways to make your projects easier, faster, and more enjoyable. From home improvement to crafting and woodworking, knowing the right tips and tricks can save you time, money, and frustration. In this guide, we’ll cover a range of helpful DIY tips that will elevate your projects and help you achieve professional-looking results, no matter your skill level.
Let’s dive into these game-changing DIY hacks!
1. Measure Twice, Cut Once – But with a Twist
This classic DIY tip is well-known for good reason: it’s a surefire way to avoid costly mistakes. However, there’s a more advanced twist to it that can save you even more time:
Use a measuring tape with a built-in level.
Many measuring tapes come with a small built-in level feature, allowing you to measure and ensure that your cuts are not only accurate in length but also level. This feature is especially helpful for hanging shelves, framing walls, or ensuring that cuts on large pieces of wood are perfectly aligned.
Tip: When measuring for cuts, always take into account the thickness of your saw blade (also called the kerf). If you’re working with precise measurements, subtract the width of the saw blade from your measurements to avoid cutting too short.
2. Sanding Secrets for Smooth Finishes
Sanding can be a tedious task, but it’s essential to achieving a smooth, professional finish on any woodworking or painting project. Here are some expert sanding tricks:
Start with the right grit:
- For rough surfaces, use a lower-grit sandpaper (around 60-80 grit) to remove imperfections or rough edges.
- For smoothing out surfaces, use a medium-grit sandpaper (120-150 grit).
- Finish with fine-grit sandpaper (220-400 grit) for a silky smooth surface, perfect for staining or painting.
Tip: Instead of sanding in a straight line, use circular motions. This technique helps prevent visible scratches and swirls, ensuring a more even finish. You can also use an orbital sander to reduce the effort and get a flawless surface more quickly.
Hack: When sanding between coats of paint or finish, use a fine-grit sanding sponge instead of sandpaper. This will give you more control and prevent you from damaging the underlying layers.
3. Use Painter’s Tape for Crisp, Clean Lines
Painter’s tape is a DIY staple, but many people don’t use it to its full potential. If you’re looking for those crisp, professional-looking paint lines, here’s how to do it:
For perfect lines, apply the tape correctly:
- Press down the edges: After applying the painter’s tape, run a plastic scraper or your fingernail along the edges to seal them tightly to the surface. This prevents paint from bleeding under the tape.
- Paint over the tape with the base color: Before using the final color, quickly paint a thin layer of your base color (the color of the surface you’re painting over) along the tape’s edge. This seals the tape’s edges and prevents the final color from bleeding underneath.
Tip: Remove the painter’s tape while the paint is still slightly wet for the sharpest lines. If you wait too long, the paint may peel off with the tape.
4. How to Get Perfectly Straight Cuts (Without a Saw Guide)
Cutting straight lines can be challenging, especially when you don’t have a saw guide. Here’s a simple trick to achieve straight cuts with ease:
Use a clamp-on straight edge:
- Take a long, sturdy piece of scrap wood (or even a metal ruler) and clamp it down along your cut line. This will act as a guide for your saw, ensuring that your cut stays straight and true.
Hack: If you don’t have clamps, use painter’s tape to secure your guide. Just be sure to remove the tape carefully after cutting to avoid pulling up any paint or finish from your material.
5. Keep Screws, Nails, and Small Parts Organized
When you’re in the middle of a project, small parts like screws, nails, and washers can easily get lost or mixed up. To keep things organized:
Use a magnetic tray or small containers:
Magnetic trays are perfect for keeping screws, nails, or small tools in one place, especially when you’re moving between different stages of a project. If you don’t have one, consider repurposing small containers like plastic food storage or even an egg carton for keeping small hardware items sorted.
Tip: Label your containers if you have different types or sizes of screws. You’ll save a ton of time later when you’re looking for that specific screw you need!
6. Masking and Protecting Surfaces During Paint Jobs
Painting can be messy, and protecting surrounding surfaces can be a hassle. Here are a couple of tips to keep everything clean:
Use drop cloths strategically: Instead of laying down large, cumbersome drop cloths, opt for using disposable plastic or canvas dust sheets that cover only the areas you need. This way, you’re not tripping over fabric, and cleanup is easier.
Tip: If you’re painting a wall and want to protect your trim, use FrogTape or painter’s tape, which creates a cleaner line than regular tape, ensuring that the paint doesn’t bleed onto the trim.
7. Use Wood Glue for Stronger Joints (And Clamp It Right)
When it comes to wood projects, wood glue is essential for creating strong joints. But there’s a trick to making it even more effective:
Don’t overdo the glue!
It’s easy to slather glue on, thinking more is better, but that’s not the case. Apply a thin, even layer of glue to both surfaces being joined. Too much glue will create a mess and weaken the bond, as excess glue will not properly bond with the wood.
Clamping the joint:
- After applying the glue, clamp the two pieces tightly together. You want enough pressure to squeeze out any excess glue, but not so much that you distort the shape.
- Use a few different-sized clamps, or consider band clamps for larger projects to keep everything aligned.
Tip: Wipe off excess glue immediately with a damp cloth, as it can leave visible stains if left to dry.
8. Avoid Over-Scraping Paint with a Paintbrush Comb
After a few projects, paintbrushes can get clogged with dried paint. Cleaning them properly will extend their life and ensure smooth strokes for your next project.
Use a paintbrush comb:
A paintbrush comb is a simple tool with fine teeth that can be used to remove dried paint and gunk from your brushes. Run the comb gently through the bristles and rinse under warm water for a cleaner brush that’s ready for its next task.
Hack: After cleaning, reshape the brush by gently running your fingers along the bristles and allowing the brush to dry flat, ensuring it holds its shape for the next use.
9. Improve Your DIY Skills with This Simple Trick
Sometimes, improving your DIY skills is as simple as investing a bit of time into learning a technique or practicing a tool. Try this:
Do a test run:
Before diving into your main project, practice your technique on scrap materials. This gives you the chance to troubleshoot issues like uneven cutting, improper sanding, or difficulties with paint application.
Tip: If you’re using a new tool, like a power sander or a drill, take it for a test run on an old piece of wood to get comfortable with its operation. This can help prevent costly mistakes when you’re working on your final piece.
10. Keep Your Tools in Top Shape with Regular Maintenance
Your tools are the heart of your DIY projects, and taking care of them will ensure they work effectively and last longer. Here’s how:
Sharpen your tools regularly:
Keep saw blades, chisels, and other cutting tools sharp to reduce effort and achieve cleaner cuts. For saws, you can use a sharpening stone or have them professionally sharpened. For hand tools, a small honing kit will do the job.
Oil and clean your tools:
Rust can quickly destroy your tools, so wipe them down after each use and apply a thin layer of oil to metal parts. This protects them from moisture and keeps everything running smoothly.
Tip: Use a simple tool chest to keep everything organized and safe. A clean, organized toolbox ensures you can easily find what you need and prolongs the life of your tools.
Conclusion
With these DIY tips and tricks in your toolkit, you’ll be able to tackle projects more efficiently, achieve more professional results, and enjoy the process a lot more. Whether you’re painting, building furniture, or tackling a simple home repair, small changes in how you approach a task can make a world of difference.
Experiment with these hacks, and soon you’ll have a collection of your own tips and tricks that make each project easier than the last. Happy DIY-ing!
I hope this collection of tips helps inspire and streamline your DIY projects! Feel free to leave any additional hacks or questions in the comments below.