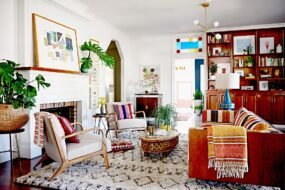
Home improvement can feel overwhelming, especially when you’re considering all the rooms in your house. However, breaking it down room by room makes it manageable—and fun! Whether you’re looking to enhance functionality, increase aesthetic appeal, or boost your home’s value, there are plenty of DIY projects you can undertake. This guide explores creative and practical home improvement ideas for every space in your home.
1. Living Room: Creating a Cozy Oasis
Project Idea: Accent Wall
Materials Needed:
- Paint or wallpaper
- Painter’s tape
- Paintbrushes and rollers
- Drop cloth
Instructions:
- Choose Your Color or Pattern: Decide on a color or wallpaper that complements your existing decor.
- Prepare the Area: Move furniture and cover the floor with a drop cloth. Use painter’s tape to outline the edges where you will paint.
- Apply the Paint or Wallpaper: If painting, use a roller for large areas and a brush for corners. For wallpaper, follow the manufacturer’s instructions.
- Let It Dry: Allow the paint or wallpaper to dry completely before removing the tape and moving furniture back.
An accent wall adds depth and interest to your living room, making it a focal point.
Project Idea: DIY Shelving
Materials Needed:
- Wooden boards
- Brackets
- Screws
- Drill
- Level
Instructions:
- Select Your Boards: Choose wood that matches your decor. Measure the space to determine the length needed.
- Install Brackets: Mark where you want to place your shelves. Use a level to ensure they are straight, then drill the brackets into the wall.
- Add the Shelves: Place the wooden boards on the brackets. Secure them if necessary.
- Style Your Shelves: Decorate with books, plants, and personal items.
Shelves not only save space but also provide a stylish way to display your personality.
2. Kitchen: Functional and Stylish Updates
Project Idea: Cabinet Refresh
Materials Needed:
- Eco-friendly paint or stain
- Sandpaper
- Paintbrushes or rollers
- New hardware (handles and knobs)
Instructions:
- Remove Cabinet Doors: Take off the cabinet doors and hardware.
- Sand the Surfaces: Lightly sand the cabinets to prepare them for painting.
- Paint or Stain: Apply your chosen color or stain, allowing for drying time between coats.
- Replace Hardware: Install new handles or knobs for an instant upgrade.
- Reattach Doors: Once everything is dry, reattach the doors and admire your handiwork!
Refreshing your cabinets can completely transform the look of your kitchen.
Project Idea: Backsplash Update
Materials Needed:
- Peel-and-stick tiles or adhesive tiles
- Utility knife
- Measuring tape
- Level
Instructions:
- Measure the Area: Determine how much tile you need to cover the space.
- Prepare the Surface: Clean the wall thoroughly to ensure good adhesion.
- Apply the Tiles: Start from the bottom and work your way up, using a level to keep everything straight. Cut tiles as needed to fit.
- Grout (if applicable): If using traditional tiles, apply grout according to the manufacturer’s instructions.
- Seal the Edges: Once everything is dry, seal the edges for a finished look.
A new backsplash can add color and personality to your kitchen.
3. Bathroom: Small Changes, Big Impact
Project Idea: Vanity Upgrade
Materials Needed:
- Paint or stain
- New hardware
- Optional: new countertop or sink
Instructions:
- Remove Old Hardware: Take off handles and knobs.
- Sand and Paint: Lightly sand the vanity, then paint or stain to your liking.
- Install New Hardware: Add new handles or knobs for an updated look.
- Upgrade the Top (if desired): Replace the countertop or sink to elevate the entire vanity.
A refreshed vanity can dramatically enhance your bathroom’s appearance.
Project Idea: Shower Curtain and Accessories
Materials Needed:
- New shower curtain
- Matching bath mats
- Towel set
Instructions:
- Choose a Theme: Select a shower curtain that matches your decor style.
- Coordinate Accessories: Find bath mats and towels in complementary colors or patterns.
- Update Fixtures (if desired): Consider changing the showerhead or faucets for an instant upgrade.
Coordinated accessories create a cohesive look that feels fresh and inviting.
4. Bedroom: Creating a Personal Retreat
Project Idea: Statement Headboard
Materials Needed:
- Plywood or an old door
- Foam padding
- Upholstery fabric
- Staple gun
Instructions:
- Cut the Base: Cut the plywood or door to your desired headboard size.
- Add Foam Padding: Attach foam padding to the wood using spray adhesive.
- Upholster: Wrap the fabric around the foam and secure it with a staple gun.
- Attach to Wall: Secure the headboard to the wall or the bed frame.
A custom headboard adds character and comfort to your bedroom.
Project Idea: Closet Organization
Materials Needed:
- Storage bins or baskets
- Shelving units
- Hangers
Instructions:
- Empty the Closet: Take everything out and sort items into categories.
- Clean the Space: Vacuum and dust before organizing.
- Install Shelving (if needed): Add shelves to maximize vertical space.
- Organize Items: Use bins for smaller items and hang clothes by type.
A well-organized closet makes getting ready easier and more enjoyable.
5. Home Office: A Productive Environment
Project Idea: Desk Redesign
Materials Needed:
- Old desk (thrifted or repurposed)
- Paint or stain
- New hardware (if applicable)
- Organizers (optional)
Instructions:
- Prep the Desk: Sand down the surface if repainting or staining.
- Paint or Stain: Apply your chosen finish, allowing for adequate drying time.
- Add Organizers: Consider adding drawer organizers for better functionality.
- Style Your Desk: Personalize with decorative items or plants.
A refreshed desk can enhance productivity and inspire creativity.
Project Idea: Wall Organization
Materials Needed:
- Corkboard or pegboard
- Paint (optional)
- Hooks and pins
- Accessories (like baskets)
Instructions:
- Choose Your Board: Select a corkboard or pegboard that fits your wall space.
- Paint (if desired): Customize the board with paint to match your decor.
- Hang the Board: Secure it to the wall at eye level.
- Add Accessories: Use hooks for tools or baskets for supplies.
This project helps keep your workspace organized and visually appealing.
6. Entryway: First Impressions Matter
Project Idea: Shoe Storage Solution
Materials Needed:
- Wooden crates or an old dresser
- Paint or stain
- Cushions (optional)
Instructions:
- Choose Your Storage: Decide between crates or repurposing a dresser.
- Paint or Stain: Refresh the look with a new finish.
- Add Cushions (if desired): Place cushions on top for a bench-like appearance.
- Organize Shoes: Use the storage to keep shoes neat and accessible.
A functional entryway sets the tone for your home and makes coming and going easier.
Project Idea: Wall Hooks and Organizer
Materials Needed:
- Wall-mounted hooks or a coat rack
- Shelf (optional)
- Paint (if needed)
Instructions:
- Select Your Hooks: Choose stylish hooks that match your decor.
- Install Hooks: Secure them to the wall at a comfortable height.
- Add a Shelf (if desired): Mount a shelf above the hooks for extra storage.
- Decorate: Use the shelf for decorative items or storage bins.
This project adds organization and style to your entryway.
7. Outdoor Spaces: Enhancing Curb Appeal
Project Idea: Front Porch Refresh
Materials Needed:
- Outdoor paint
- New welcome mat
- Plants and planters
- Outdoor furniture (if desired)
Instructions:
- Paint the Porch: Choose a color that complements your home.
- Add a Welcome Mat: Choose a mat that reflects your style.
- Incorporate Plants: Use planters to add greenery and color.
- Style with Furniture: If space allows, add a small table and chairs for a cozy atmosphere.
An inviting porch enhances curb appeal and creates a welcoming atmosphere.
Project Idea: Garden Pathway
Materials Needed:
- Pavers, stones, or gravel
- Landscaping fabric
- Edging (optional)
Instructions:
- Plan Your Path: Decide where the pathway will go and mark the outline.
- Prepare the Area: Remove grass and debris to create a flat surface.
- Lay Landscaping Fabric: This prevents weeds from growing through.
- Add Pavers or Gravel: Arrange pavers or pour gravel to create the pathway.
- Edge (if desired): Use edging materials to define the pathway.
A well-defined path adds functionality and visual appeal to your garden.
Conclusion
Home improvement doesn’t have to be daunting; breaking projects down room by room makes it manageable and rewarding. From enhancing the living room with an accent wall to organizing your home office for productivity, each project can add value and style to your home. Embrace the DIY spirit, and enjoy the transformation of your space into a more beautiful and functional environment! With creativity and some effort, you can create a home that truly reflects your personality and lifestyle.


