Introduction
Redesigning your living space can be an invigorating experience, but it doesn’t have to come with a hefty price tag. Embracing DIY (Do-It-Yourself) projects allows you to infuse your personal touch into your home decor while also saving money. Whether you’re looking to refresh a single room or overhaul your entire home, DIY decor and design can be a fulfilling way to achieve a stylish, customized space. In this blog, we’ll explore creative and budget-friendly DIY ideas to help you transform your space into a chic haven.
1. Revitalize Your Walls
a. DIY Wall Art
Wall art is a fantastic way to express your personality and style. Instead of purchasing expensive artwork, consider creating your own.
Materials Needed:
- Canvas or large frames
- Acrylic paints or watercolor
- Brushes or sponges
- Painter’s tape (for geometric designs)
- Markers or stencils (for detailed designs)
Instructions:
- Choose a Theme: Decide on the theme or color scheme for your wall art. You might go for abstract designs, nature-inspired themes, or motivational quotes.
- Prepare Your Canvas: If using canvas, stretch it on the frame. For a more affordable option, use large poster boards or even old picture frames.
- Design and Paint: Start with a base coat if necessary. Use painter’s tape to create geometric patterns or freehand your design. Experiment with colors and textures.
- Finishing Touches: Once the paint is dry, add details with markers or stencils.
Tip: You can also use old maps, vintage fabric, or wrapping paper as unique and cost-effective wall decor.
b. Create a Gallery Wall
A gallery wall adds character and can be a focal point in any room.
Materials Needed:
- Various picture frames (mix sizes and styles)
- Photos, prints, and artwork
- Command strips or nails
- Measuring tape and level
Instructions:
- Select Your Frames: Choose frames that complement each other but also vary in size and style.
- Arrange Your Layout: Lay out the frames on the floor to experiment with different arrangements before committing to the wall.
- Hang Your Art: Use a measuring tape and level to ensure everything is straight. Use Command strips for an easy and damage-free installation or nails for a more secure hold.
Tip: Incorporate different textures and materials, like fabric or 3D elements, to add depth to your gallery wall.
2. Revamp Furniture
a. Paint or Refinish Old Furniture
Giving old furniture a new lease on life can be an easy and rewarding project.
Materials Needed:
- Sandpaper or a sanding block
- Primer (if needed)
- Paint or stain
- Paintbrushes or rollers
- Sealer (optional)
Instructions:
- Prepare the Furniture: Sand down the surface to remove any old finish and ensure the paint or stain adheres well.
- Apply Primer: If the furniture has a glossy finish, apply a primer to help the new paint stick.
- Paint or Stain: Apply your chosen color or stain. For a smoother finish, use a brush for edges and a roller for larger surfaces. Multiple coats may be required.
- Seal (Optional): For added durability, apply a clear sealer once the paint is dry.
Tip: Experiment with chalk paint for a matte, vintage look or use metallic paint for a touch of glam.
b. Update Furniture Hardware
Changing out knobs and handles can dramatically alter the look of furniture pieces.
Materials Needed:
- New knobs or handles
- Screwdriver
Instructions:
- Select Hardware: Choose hardware that complements your decor style. Options range from sleek modern to rustic antique.
- Remove Old Hardware: Unscrew the existing knobs or handles.
- Install New Hardware: Align and screw in the new pieces.
Tip: Mix and match hardware for a personalized touch or choose coordinated sets for a cohesive look.
3. Create Functional Decor
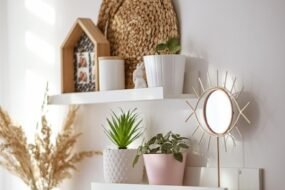
a. DIY Shelving
Shelving is both practical and stylish, providing storage while also showcasing decor.
Materials Needed:
- Wooden planks or floating shelf kits
- Brackets or wall anchors
- Screws and a drill
- Level and measuring tape
Instructions:
- Measure and Mark: Decide where you want your shelves and mark the wall accordingly.
- Install Brackets: Secure the brackets or wall anchors into the wall using a drill.
- Mount Shelves: Place the wooden planks on the brackets and ensure they are level.
Tip: For a more custom look, stain or paint the wood to match your decor, or use decorative brackets for added style.
b. Design Your Own Storage Solutions
From magazine racks to under-bed storage, there are countless DIY storage solutions you can create.
Materials Needed:
- Wooden crates or fabric bins
- Paint or fabric
- Glue or nails
Instructions:
- Choose Your Material: Decide whether you want to use wooden crates, fabric bins, or other materials.
- Decorate: Paint or cover the crates or bins to match your room’s decor.
- Assemble: If necessary, assemble the pieces together or attach to a wall.
Tip: Customize storage solutions to fit specific needs, like adding dividers to a crate for better organization.
4. Upgrade Your Lighting
a. DIY Pendant Lights
A unique pendant light can be a statement piece in your room.
Materials Needed:
- Light fixture kit
- Lampshade or DIY materials (e.g., wire basket, fabric)
- Light bulb
Instructions:
- Choose a Design: Decide on the look you want for your pendant light. Options include using a wire basket as a shade or creating a fabric-covered shade.
- Prepare the Fixture: Follow the instructions on the light fixture kit to assemble it.
- Attach the Shade: Secure your chosen shade to the fixture.
Tip: Paint or embellish the shade to match your room’s theme.
b. DIY Fairy Light Displays
Fairy lights add a whimsical touch to any space.
Materials Needed:
- Fairy lights
- Hooks or adhesive strips
- Decorative elements (e.g., photos, paper lanterns)
Instructions:
- Plan Your Layout: Decide where you want to hang the fairy lights.
- Attach Hooks: Install hooks or use adhesive strips to mount the lights.
- Decorate: Drape the lights and add any decorative elements.
Tip: Create a curtain of fairy lights behind your bed or along a wall for a magical effect.
5. Personalize Your Space
a. DIY Throw Pillows
Throw pillows can instantly change the look of a sofa or bed.
Materials Needed:
- Fabric (cotton, linen, or velvet)
- Pillow inserts or stuffing
- Sewing machine or fabric glue
- Scissors and measuring tape
Instructions:
- Measure and Cut Fabric: Cut the fabric to the desired size for your pillows.
- Sew or Glue: Sew the edges together, leaving a gap to insert the pillow or stuffing. If using fabric glue, apply along the edges and press firmly.
- Insert Pillow: Fill with pillow inserts or stuffing and close the gap.
Tip: Use different fabrics and patterns to mix and match pillows for a vibrant look.
b. Create Your Own Rugs
Custom rugs can tie a room together and add warmth.
Materials Needed:
- Rug canvas or old rugs
- Fabric paint or dye
- Stencils or brushes
Instructions:
- Choose Your Base: Use a rug canvas or old rug as your base.
- Design and Paint: Apply fabric paint or dye using stencils or freehand techniques.
- Let Dry: Allow the rug to dry completely before using it.
Tip: If you’re not up for painting, try adding a fabric border or fringe to an existing rug for a fresh look.
Conclusion
Transforming your space through DIY decor and design is an empowering and cost-effective way to make your home truly your own. From revitalizing your walls and revamping furniture to creating functional decor and upgrading lighting, there’s no limit to what you can achieve with a little creativity and effort. Remember, the key to successful DIY projects is planning and patience. Embrace your unique style, experiment with different techniques, and most importantly, have fun making your space a reflection of who you are. Happy decorating!


