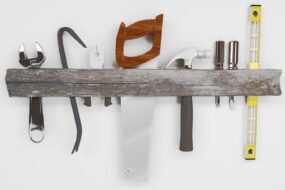
Diving into the world of DIY projects is both exciting and rewarding. Whether you’re interested in woodworking, home repairs, or crafting, having the right tools is crucial for success. As a beginner, it can be overwhelming to figure out which tools to invest in first. This guide will help you build a solid toolkit that will serve as the foundation for your DIY endeavors. Let’s explore the essential tools every beginner should have and how to use them effectively.
1. Measuring and Marking Tools
Accurate measurements are the cornerstone of any successful DIY project. Start with these basic tools to ensure precision:
- Tape Measure: A tape measure is a must-have for any DIYer. Look for a 25-foot tape measure with both metric and imperial units, which will cover most projects.
- Ruler or Straight Edge: A 12-inch metal ruler is perfect for smaller measurements and ensuring straight cuts. A straight edge, often longer, helps with drawing long, straight lines.
- Combination Square: This versatile tool is used for measuring 90-degree angles, marking straight lines, and checking for squareness.
- Pencil: A simple carpenter’s pencil or mechanical pencil is essential for marking measurements on various materials.
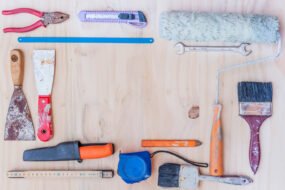
2. Cutting Tools
Cutting materials to size is a fundamental part of DIY projects. Here are the basic cutting tools you’ll need:
- Utility Knife: A sharp utility knife is perfect for cutting light materials like cardboard, vinyl, and drywall. Choose one with a retractable blade for safety.
- Handsaw: A handsaw is ideal for cutting wood by hand. A general-purpose crosscut saw is versatile enough for most beginner projects.
- Coping Saw: For more intricate cuts and curves in wood, plastic, or metal, a coping saw is your go-to tool.
- Tin Snips: These are great for cutting thin metal sheets, wire mesh, and other materials that a saw or knife can’t handle.
3. Fastening Tools
Joining materials together requires reliable fastening tools. Here’s what you’ll need to get started:
- Hammer: A claw hammer is essential for driving nails and removing them. A 16-ounce hammer is a good all-around choice for beginners.
- Screwdrivers: Invest in a set of screwdrivers with both flathead and Phillips heads. Magnetic tips can make it easier to handle screws.
- Power Drill: A cordless power drill is a game-changer for drilling holes and driving screws quickly and efficiently. Look for one with variable speed settings and a range of drill bits.
- Screws and Nails: Keep a variety of screws and nails on hand for different materials and projects. Common sizes will cover most of your needs.
4. Sanding and Finishing Tools
Smooth surfaces and clean finishes are key to a professional-looking project. Here’s what you’ll need:
- Sandpaper: Start with a variety of grits (80, 120, 220) to cover rough sanding, smoothing, and finishing. Sanding blocks can make hand-sanding easier and more even.
- Orbital Sander: For larger projects, an orbital sander can save you time and effort. It’s perfect for smoothing wood, removing paint, and preparing surfaces for finishing.
- Paint Brushes: A set of good-quality paint brushes in various sizes is essential for painting, staining, and applying finishes.
- Putty Knife: Use a putty knife for applying wood filler, patching holes, and scraping off old paint or glue.
5. Clamping and Holding Tools
Holding materials securely while you work is crucial for precision and safety. Start with these basic clamping tools:
- Clamps: Bar clamps and C-clamps are indispensable for holding pieces together while glue dries or securing materials to your workbench.
- Bench Vise: If you have a workbench, a bench vise can hold materials steady while you saw, sand, or drill.
- Workbench: Although not a tool per se, a sturdy workbench with a flat surface is essential for most DIY projects. It provides a safe, stable area to work on.
6. Safety Equipment
Safety should always be a priority in DIY projects. Protect yourself with these essential safety tools:
- Safety Glasses: Protect your eyes from dust, debris, and flying particles with a good pair of safety glasses.
- Hearing Protection: Use earplugs or earmuffs when operating loud tools like power drills and saws.
- Gloves: Durable work gloves protect your hands from cuts, splinters, and abrasions. Choose gloves that provide both protection and dexterity.
- Dust Mask or Respirator: When sanding, sawing, or working with chemicals, a dust mask or respirator will protect your lungs from harmful particles.
7. Advanced Tools to Consider as You Progress
As you gain experience and take on more complex projects, you might consider expanding your toolkit with these advanced tools:
- Circular Saw: Ideal for making quick, straight cuts in wood and other materials.
- Jigsaw: Perfect for cutting curves and intricate shapes in wood, plastic, and metal.
- Miter Saw: Great for making precise angled cuts, particularly for framing and molding.
- Table Saw: A powerful tool for ripping large sheets of wood with precision.
- Router: Useful for adding decorative edges, hollowing out areas, and shaping wood.
8. Tips for Building Your Tool Collection
Building a complete toolkit doesn’t have to happen overnight. Here are some tips for assembling your tools without breaking the bank:
- Start Small: Focus on the essentials first. As you tackle more projects, you’ll get a better sense of what additional tools you need.
- Buy Quality: Invest in high-quality tools that will last longer and perform better. Cheap tools can be frustrating to use and may need to be replaced frequently.
- Look for Sales: Keep an eye out for sales at hardware stores, online, and in second-hand shops. You can often find great deals on quality tools.
- Borrow or Rent: If you need a specific tool for a one-time project, consider borrowing from a friend or renting from a tool library or rental shop.
Conclusion
Starting your DIY journey with the right tools sets the foundation for successful projects. By investing in these essential tools, you’ll be well-equipped to take on a wide range of DIY tasks, from simple repairs to more complex creations. As you build your skills and confidence, you can gradually expand your toolkit and tackle even more ambitious projects. Remember, the key to a successful DIY project is not just having the right tools but also taking the time to learn how to use them safely and effectively.
Happy building!