If you’re a home decor enthusiast, you’ve probably thought of a million ways to manage your
space aesthetically. But nothing beats the satisfaction that comes with making your own DIY
wood shelves. They’re practical and modern and add a personal touch to your home!
Better yet, you don’t have to be a professional to make your own wood shelf. All it takes is the
right set of tricks under your belt, and you’re ready. So, I’ve put together the steps, tips, and
tricks you need to make your DIY wood shelves!
Supplies & Materials for Making Wooden Shelves
First things first, you need to gather the necessary supplies and materials to get things going. The
right bunch of tools at hand will accelerate the process without having to stop the project in
between. This makes your DIY upgrade styles easier than ever.
Here’s a list of the tools you’ll need to build your own shelves:
Electric Saw
If you’re planning to cut the wood yourself, an electric saw is a must-have in your toolkit.
However, make sure you go for a saw with a sharp enough blade to cut through the wood piece.
Just line up the saw as straight as you can for a clean cut. With a few tries, an efficient electric
saw will cut the wood pieces in your desired shape and size, ready for sanding!
Tape Measure
When building your DIY wood shelves, a tape measure is one of the most essential tools on the
list. It measures the wood with pinpoint accuracy and makes sure your cuts are precise so that
your shelf fits perfectly. Whether you’re marking where to cut or where to place the brackets on
the wall, your tape measure will line up everything perfectly.
Sander or Sanding Blocks
Goes without saying that sanding your wood gives it the smooth, polished, and refined look you
need. While this can be done with hand sandpaper, I suggest using an orbital sander for a finer
finish.
Orbital sanders are portable power tools that work in a random rotational pattern to give your
wooden shelves a smoother look. This way, you don’t have to worry about sanding taking up
days to finish!
Shelving Brackets
Whether you’re a beginner or an experienced DIY wood shelf builder, choosing the right
shelving brackets will guide the process ahead. Shelving brackets provide stability and support
for your DIY wood shelves, which need to hold weight without sagging or collapsing. Plus, they
make installation pretty simple, which allows for easy adjustments and repositioning.
Power Drill
Without a proper power drill, you could not possibly live up to the challenge of building wood
shelves. They’re great for making holes into your wood planks, so you can screw them up and
anchor them to your desired position.
Besides the basic models, there are versions with various accessories that can tighten and loosen
fasteners, sand, sharpen, and grind surfaces, and even mix paint or mortar. Honestly, that’s a
huge plus when deciding on a power drill for your DIY projects!
How to Make DIY Wood Shelves?
Now that you have all the necessary tools at hand, it’s time to cut to the chase – How to make
DIY wood shelves? But before that, remember that the saws, tape measures, and power drill
you’ve gathered alone won’t suffice. You’ll still need basics like bolts, paints, and screwdrivers
to finish the job.
On top of that, pull up your safety gadgets, such as goggles and gloves, and make sure you begin
the process in a spacious place to avoid any accidents. Next up, you’re ready to build your own
shelves with this 7-step process:
Step 1: Choose Your Shelf Size & Wood
Before all else, choose the size of the shelf you think will best suit your space. Consider the
depth and length carefully before you begin. For instance, my living room shelves are 10 inches
deep, 2 inches thick, and 48 inches long.
Once you know the size, it’s time to choose the wood you’ll use to build your DIY shelf. While
there are plenty of options out there, make sure the wood you use corresponds to the load you
plan to place on the shelf. As for the wood types, you can go with pre-made boards, common
lumber, plywood, MDF, hardwood, or softwood.
Source: https://www.pinterest.com/pin/512425263851127990/
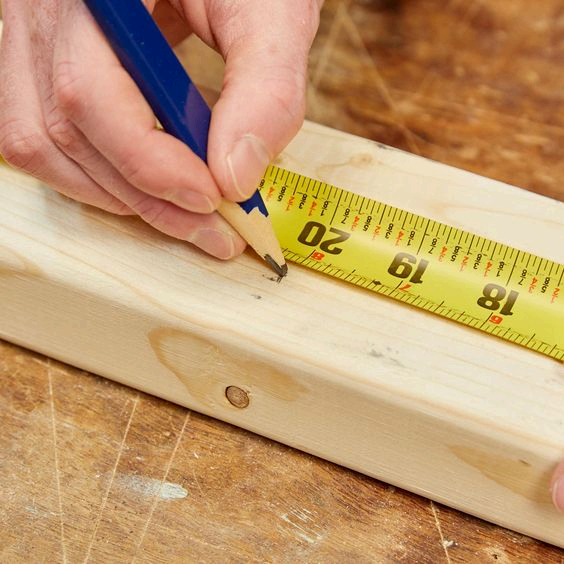
Step 2: Measure and Cut Your Board
After measuring your area, you need to measure and cut your board for a perfect fit. Once you’ve decided on the size, use a miter saw to make your cuts. Mark the desired length on your wood board and draw a straight line using a speed square. This helps guide your cuts for accuracy.
But hey, if your miter saw can’t cut all the way through the board in one pass, flip the piece over and complete the cut. Or, opt for a saw that efficiently cuts through your chosen wood’s depth. After making your cuts, you’ll have pieces of wood ready for sanding to smooth out any rough edges or surfaces.

2: Measure and Cut Your Board
Source: https://www.pinterest.com/pin/586875395208904175/
Step 3: Sand the Wood
It’s time for the sanding to ensure your final DIY project is as smooth as it gets. Use an electric sander to even out the imperfections on the wooden shelf’s surface. Begin sanding gently to get used to the tool till you’re removing material evenly. Plus, use long, even strokes along the grain of the wood.
Pro tip: Avoid pressing too hard to prevent gouges or uneven spots on the shelf’s
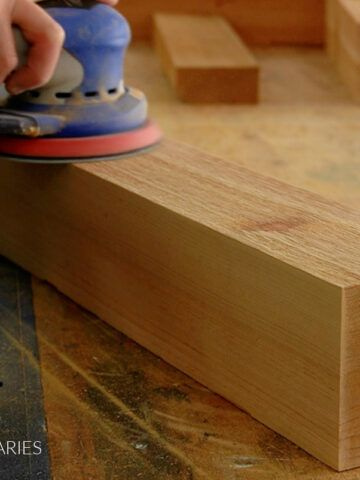
surface.Source: https://www.pinterest.com/pin/560064903677596833/
Step 4: Use a Wood Conditioner
Prior to staining your wood, it’s best to treat it with the right conditioner, or it may end up looking uneven or blotchy. Conditioners help your wood get a smooth, even finish, which looks neat when you finally put up your shelves. All you’ve got to do is to dip a rag into the conditioner and spread it evenly over all sides of the wood. Let it dry for a few minutes, then wipe off any excess. But make sure to avoid letting it pool on the surface, or staining might become a hassle.Source:

https://www.pinterest.com/pin/372743306656757413/
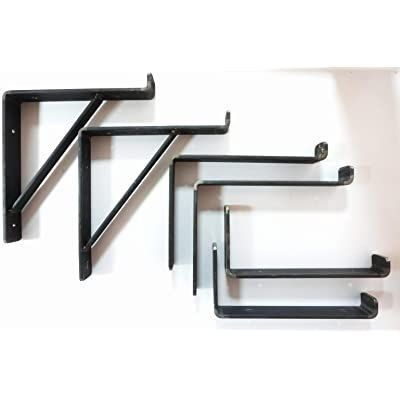
Step 5: Assemble the Brackets
When making DIY wood shelves with brackets, you’ll need to make sure the brackets fit the width of your shelves. Let’s say you have shelves that are 50.2 inches wide; it’s important to look for brackets specifically designed for that size.
Plus, don’t forget to note that the actual width of the wood is often slightly less than the labeled size (e.g., an “8-inch” board may actually be 7.25 inches wide). So, buying your wood first and then selecting brackets that match the exact size is a good idea.
If your boards are around 35 inches long, two brackets per shelf should suffice. However, consider using three or more brackets to support the entire length for longer shelves.
Source: https://www.pinterest.com/pin/323977766962571072/
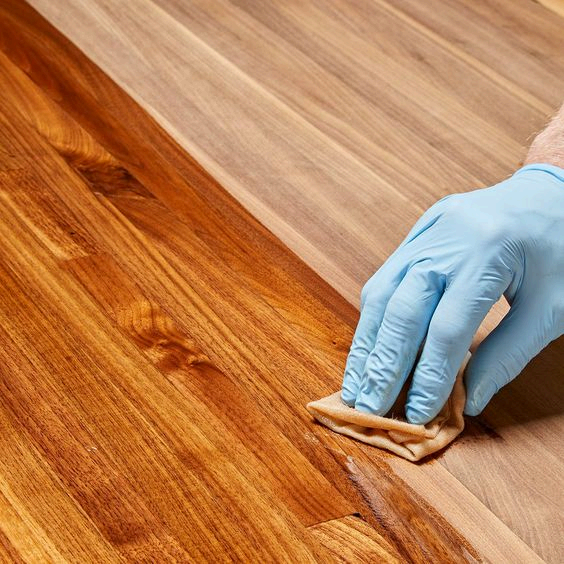
Step 6: Stain Away Your Shelf!
Once you’re done assembling the brackets, it’s time to stain away your shelf (the most interesting part!). When choosing a wood stain, pick a color that complements your space. For example, the color “Provincial” is a nice light brown that works well with many decors. For a small project like a DIY wooden shelf, an 8oz can of stain should be sufficient, as a little goes a long way.
To stain properly, make sure the wood is smooth and properly sanded. Also, use a clean rag to apply the stain. Dip the rag into the stain and spread it evenly across the wood surface. In case you prefer a darker coat, allow the first coat to dry out before applying the next coat.
Source: https://www.pinterest.com/pin/73253931431247666/
Step 7: Install the Shelf
Finally, it’s time to hang your DIY wooden shelves. When doing so, start by using a stud finder to locate wall studs for maximum support. Install the brackets on the wall first and make sure they’re leveled. Place your wood shelf on top of these brackets. With the right anchors, your shelf will be sturdy enough to hold heavy items without issues.
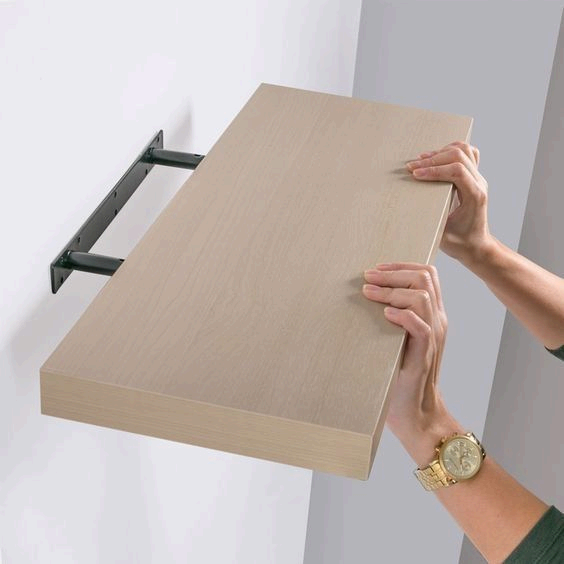
Source: https://www.pinterest.com/pin/336503403424879867/
Step 8: Style Your DIY Wooden Shelf
Once your DIY wood shelves are up, add the finishing touches to enhance the charm. You may add personal items to make the shelf uniquely yours or decorative items to give your space an extra flair. Arrange it all casually—no need to stress. In the end, it all comes down to your purpose of building a DIY wood shelf!
Here are a few styling ideas you may take inspiration from:
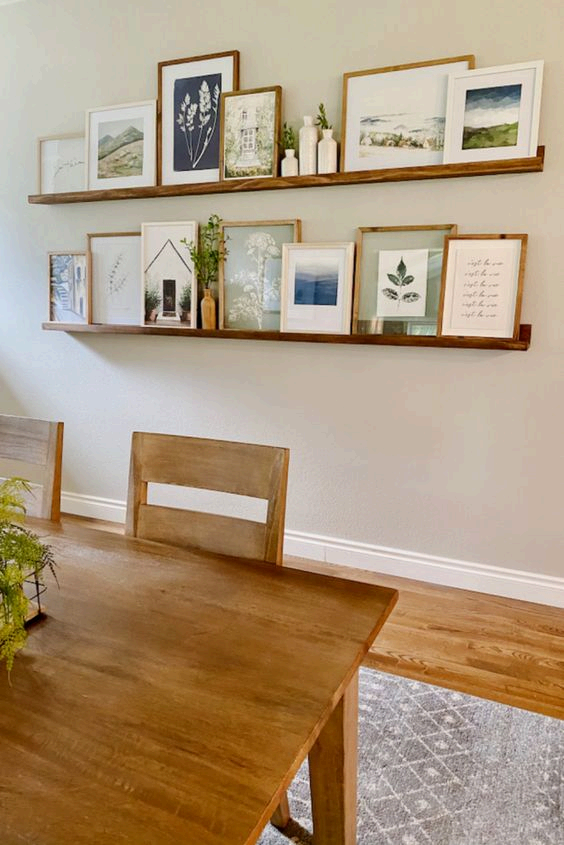
Source: https://www.pinterest.com/pin/98445941845352528/
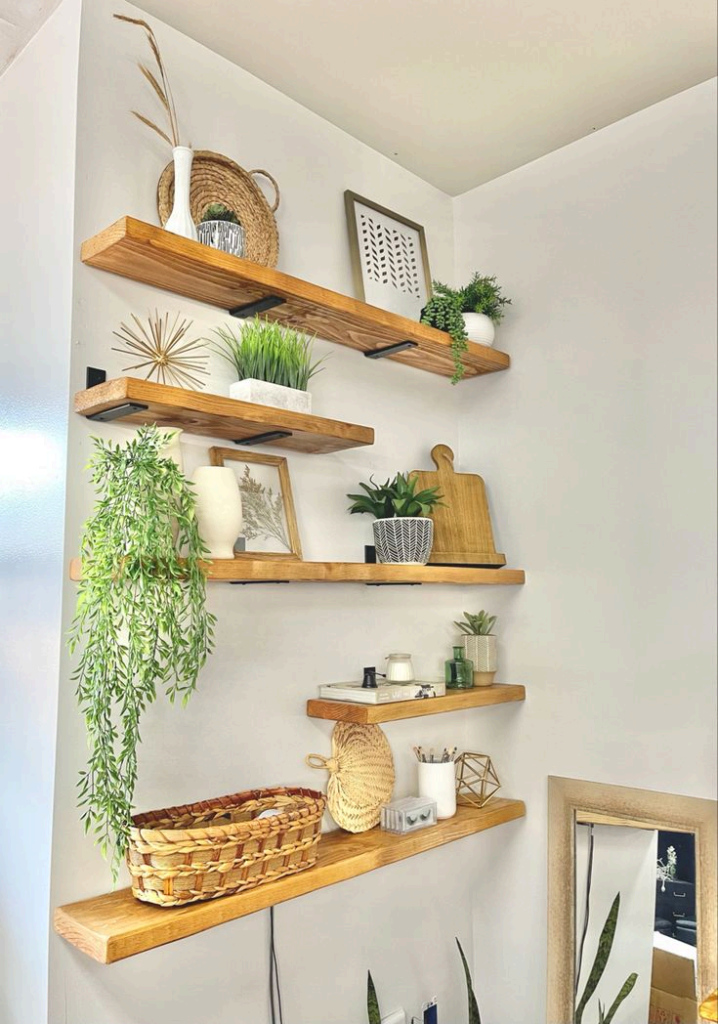
Source: https://www.pinterest.com/pin/415457134395535735/
Final Thoughts
And there you go, your DIY shelves are ready to rock! Now that you know how to build shelves, you’ll likely be super happy with how the end result turns out and be