Redecorating your home can seem like an overwhelming task, but it doesn’t have to be. With a bit of creativity and some DIY know-how, you can transform any space into a stylish haven without breaking the bank. Whether you’re renting or owning, there are plenty of simple and affordable ways to upgrade your space. From repurposing furniture to creating unique wall art, DIY decor projects can help you personalize your home, adding both charm and function.
In this post, we’ll explore seven DIY decor and design ideas that will elevate your home’s aesthetic. These projects are easy to follow, require minimal materials, and can be completed in a weekend or less. Let’s dive in and get inspired!
1. Statement Wall Art: Create Custom Pieces for Your Home
One of the easiest ways to elevate the look of a room is by adding art to the walls. Wall art can serve as the focal point of a space, adding color, texture, and personality. Instead of buying expensive prints, why not make your own? Creating your own art allows you to tailor it to your specific taste and room theme.
Materials you’ll need:
- Canvas or wooden board
- Acrylic paints or watercolors
- Brushes or sponges
- Painter’s tape (optional)
- Stencils or printouts (optional)
How-to:
- Prepare your canvas or board: Begin by selecting a canvas, wooden board, or any flat surface you want to paint on. You can also repurpose old frames and paint over the existing artwork.
- Plan your design: Whether you’re doing a simple geometric design or a more intricate abstract painting, decide on your colors and layout. Use painter’s tape to create clean lines and geometric shapes if that’s the look you’re going for.
- Get painting: Use acrylic or watercolor paints to create your design. The beauty of DIY wall art is that it’s all about expressing your creativity. Don’t be afraid to experiment with colors and techniques to make it your own.
- Hang your masterpiece: Once your painting is dry, frame it or hang it directly on the wall. Your handmade art will add a personal and stylish touch to your space.
Whether you’re into minimalistic designs or bold and colorful statements, DIY wall art offers endless possibilities. Plus, the satisfaction of creating your own artwork is priceless!
2. Repurpose Furniture: Give Old Pieces a New Life
Furniture doesn’t have to be expensive to make a statement. One of the easiest ways to change the look of a room is by repurposing old or outdated furniture. With a fresh coat of paint, new hardware, or creative alterations, you can turn an old piece into something fabulous.
Materials you’ll need:
- Sandpaper
- Paint or stain
- Paintbrushes or rollers
- New knobs, handles, or legs (optional)
- Wood filler (optional)
How-to:
- Sand the surface: Start by sanding the furniture to remove any old paint or varnish. If you’re working with wood, use a fine-grit sandpaper to smooth the surface and prepare it for paint or stain.
- Apply paint or stain: Choose a paint or stain that complements the style of your room. If you’re aiming for a modern look, go for a sleek matte black or white, or if you prefer a more rustic vibe, a rich wood stain will add warmth.
- Add new hardware: Swapping out old knobs or handles for something more modern or stylish can completely change the look of a piece. You can also replace the legs of a piece with taller ones to give it a more contemporary feel.
- Seal and finish: After painting or staining, apply a clear finish or sealer to protect the surface. This will help preserve your work and give the furniture a professional, polished look.
Repurposing furniture is a sustainable and cost-effective way to refresh your home. Whether you’re breathing new life into an old dresser or turning a coffee table into a statement piece, the possibilities are endless!
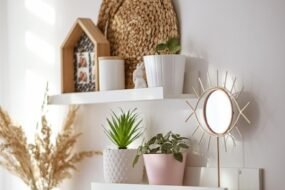
3. DIY Floating Shelves: Stylish Storage and Display
Floating shelves are a sleek and modern way to add both function and design to any room. Not only do they offer extra storage space, but they also serve as a platform for displaying your favorite decor items, books, or plants. And the best part? You can make your own!
Materials you’ll need:
- Wood planks (choose a size based on the space)
- Floating shelf brackets (or DIY your own)
- Screws
- Drill
- Level
How-to:
- Measure and cut the wood: Decide how long you want your floating shelves to be and cut the wood to size. You can use reclaimed wood for a rustic look or smooth, modern wood for a cleaner appearance.
- Install the brackets: Install the floating shelf brackets onto the wall where you want to hang your shelves. Make sure the brackets are level to ensure the shelves will sit evenly.
- Place the shelf: After the brackets are secure, place the shelf on top of the brackets. If your brackets have screw holes, you can screw the shelf into place for added stability.
- Style your shelves: Once your shelves are up, decorate them with plants, books, framed photos, or your favorite decor items. Floating shelves are great for adding personality to your room while keeping things organized.
Floating shelves are incredibly versatile and work in any room, whether in the living room, kitchen, or bathroom. They provide a functional and stylish way to display your favorite things while maximizing space.
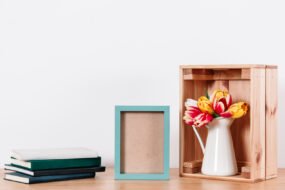
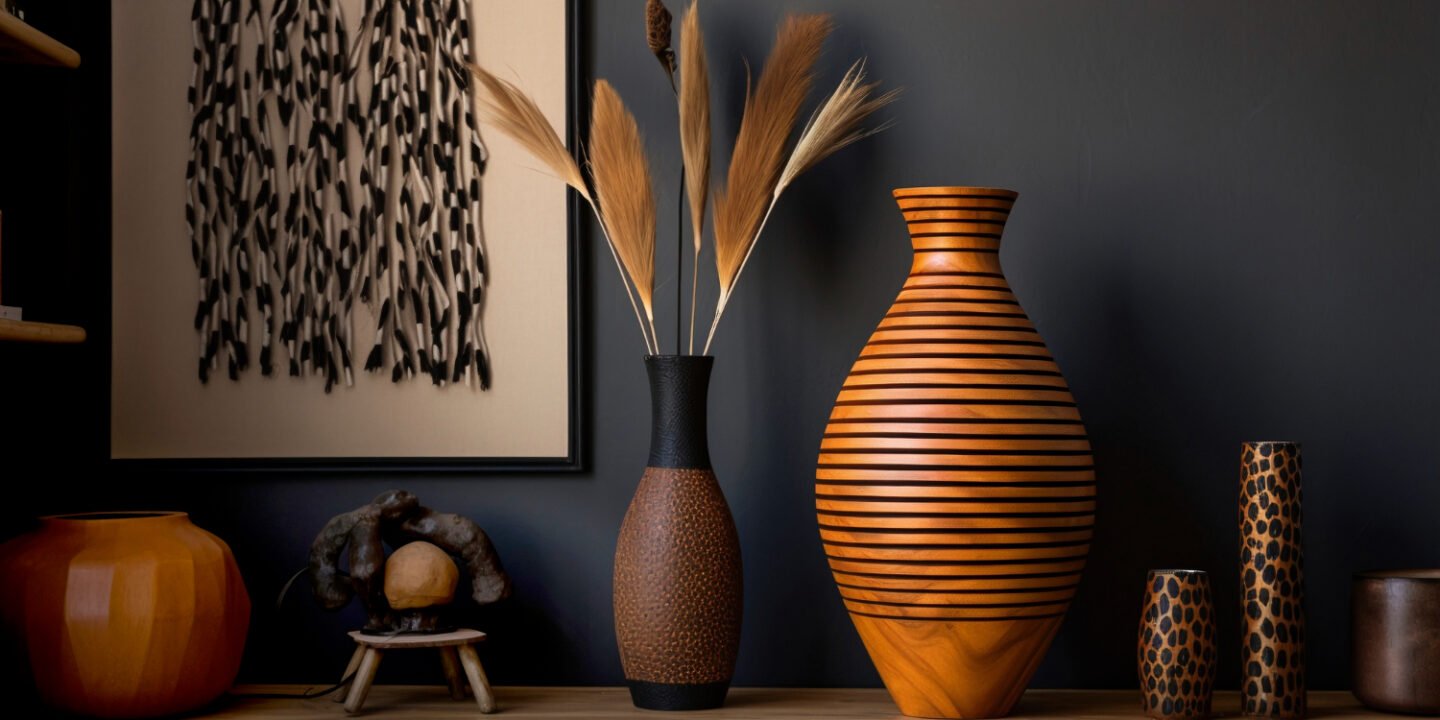
4. Upcycled Planters: Bring Greenery Into Your Home
Plants are an easy way to freshen up any space, but they can look even better in upcycled planters. Reusing old containers, cans, and jars not only adds a unique touch to your decor but is also an environmentally friendly choice.
Materials you’ll need:
- Old cans, jars, or containers (empty and clean)
- Spray paint or acrylic paint
- Potting soil
- Plants (succulents, herbs, or small indoor plants)
- Drill (optional, for drainage holes)
How-to:
- Prep the containers: Clean your old containers and remove any labels. If necessary, use a can opener to create drainage holes at the bottom of the container to prevent water from accumulating.
- Paint the containers: Use spray paint or acrylic paint to give your containers a fresh, colorful look. You can go for bold, bright hues, or keep it simple with neutral tones like black, white, or metallics for a modern touch.
- Add your plants: Fill the containers with potting soil and plant your chosen greenery. Succulents are a great option for small containers, or you can plant herbs in kitchen jars.
- Place them around the house: Display your upcycled planters on shelves, windowsills, or tables to bring a fresh, natural element to your decor.
Upcycled planters not only add character to your home but also give new life to items you might otherwise throw away. Plus, incorporating plants into your home adds a calming, organic element to any space.
5. Creative Lighting: DIY Pendant Lights and Lampshades
Lighting plays a huge role in the overall ambiance of a room. If you’re looking for a way to add a unique, eye-catching touch to your space, consider making your own pendant lights or lampshades. This simple DIY project allows you to customize the lighting to fit your home’s design style.
Materials you’ll need:
- Pendant light kit (available at most home improvement stores)
- Lampshade frame (or DIY from wire)
- Fabric, paper, or rope (depending on the look you want)
- Scissors or hot glue gun
How-to:
- Create the shade frame: If you’re using a lampshade frame, you can either purchase one or make your own from wire or a sturdy frame. For a more modern look, you can create geometric shapes or simple circular designs.
- Add fabric or material: Cover the frame with your chosen material—this could be fabric, paper, or even rope for a boho vibe. Use a hot glue gun to secure the fabric or material in place, ensuring it’s taut and even.
- Install the pendant light kit: Follow the instructions on the pendant light kit to safely install the wiring. Make sure to attach the shade to the light fixture.
- Hang and style: Once your new light is ready, hang it in a focal area of your room. Pendant lights work well over kitchen islands, dining tables, or in the living room for a stylish, modern touch.
DIY lighting projects allow you to add a personal touch to your space while keeping the design fresh and functional. With so many materials to choose from, you can create a light fixture that perfectly complements your space.
6. Wall Mirrors: DIY Mirror Frames to Enhance Your Space
Mirrors are not only functional but also make a great addition to any room, helping to reflect light and make small spaces appear larger. You can make your own mirror frame using simple materials to create a stylish focal point for any wall.
Materials you’ll need:
- Round or square mirror (depending on your preference)
- Wood or MDF board for the frame
- Glue or nails
- Paint or stain
- Decorative accents (optional, such as shells, beads, or gold leaf)
How-to:
- Choose your mirror: Start with a simple mirror or use an old mirror that needs an update. Choose the size and shape that will best fit the space where you want to hang it.
- Build the frame: Cut wood or MDF board to create the frame for your mirror. Measure the dimensions of the mirror and cut the wood to fit around it. Use a strong adhesive or nails to secure the pieces together.
- Paint or decorate: Paint or stain the frame to match your decor. For a more creative touch, you can add decorative elements such as beads, shells, or even gold leaf for a luxe look.
- Attach the mirror: Once the frame is dry, carefully glue or secure the mirror into the frame.
DIY wall mirrors are a fantastic way to customize a classic piece of decor and make a statement in your room.
7. Textile Decor: DIY Throw Pillows and Blankets
Textiles are an easy way to add texture, color, and comfort to a room. DIY throw pillows and blankets are simple projects that allow you to customize your decor to suit your style.
Materials you’ll need:
- Fabric (choose a color or pattern that suits your style)
- Pillow inserts (or stuffing for a more personalized pillow)
- Needle and thread (or sewing machine)
- Scissors
- Fabric glue (optional)
How-to:
- Cut the fabric: Measure and cut your fabric to the desired size for your pillow or blanket. If you’re making a pillow, cut two equal-sized pieces for the front and back.
- Sew or glue: If you’re sewing, stitch around the edges of the fabric, leaving a small opening to insert the stuffing or pillow insert. Alternatively, you can use fabric glue for a no-sew option.
- Stuff and finish: Fill the pillow with stuffing or insert the pillow form, then stitch or glue the opening shut.
- Style your space: Add your new throw pillows to your couch, bed, or chairs. A homemade throw blanket can add coziness to any room, especially in colder months.
Textile-based DIY projects add an inviting, tactile element to your home, making it feel more comfortable and personalized.
Final Thoughts
DIY decor projects are a great way to personalize your space without spending a lot of money. From repurposing furniture to creating custom wall art, these seven simple ideas will help transform your home into a stylish, unique haven. Whether you’re looking to add a statement piece or refresh your entire space, these projects are fun, easy, and affordable. Happy crafting!