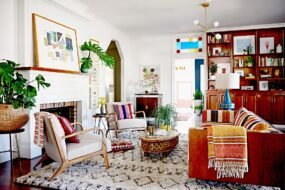
Home is where the heart is, and a well-decorated space can make it feel even more inviting, cozy, and stylish. However, redecorating can often seem like an expensive endeavor. Fortunately, DIY home decor offers a budget-friendly way to refresh your living space while adding your personal touch. Whether you’re looking to update a single room or give your entire home a makeover, there are endless possibilities when it comes to DIY home decor projects.
In this blog post, we’ll explore 10 DIY home decor ideas that are easy to tackle, cost-effective, and impactful. From creating unique art pieces to upcycling furniture, these projects will allow you to transform your home into a stylish sanctuary without breaking the bank.
1. Statement Wall Art: Express Yourself with Custom Creations
Wall art is one of the most effective ways to personalize a space. Whether you want to add color, texture, or a bold statement, creating your own wall art allows you to customize it to your tastes and the mood of the room.
Materials you’ll need:
- Canvas or wooden board
- Paint (acrylics, watercolors, or spray paint)
- Brushes or sponges
- Painter’s tape (optional for geometric designs)
- Stencils (optional)
How-to:
- Choose your base: Start with a blank canvas or wooden board. You can also repurpose old frames by painting over the existing artwork for a fresh look.
- Design your art: Use painter’s tape to create clean lines for a geometric design or freehand your artwork for a more abstract feel. If you need inspiration, check out online tutorials for step-by-step guides.
- Add your personal touch: Choose colors that complement your space. You could go for calming neutrals, vibrant hues, or even metallic paints for a bit of glam. Once the design is complete, let it dry thoroughly before framing or hanging it up.
- Hang and display: Hang your new creation on the wall to instantly add personality to the room. You’ll be amazed at how much impact a single piece of custom art can have!
Creating your own wall art is a fun and rewarding project that gives you a truly unique piece of decor, all while saving money.
2. Upcycled Furniture: Breathe New Life into Old Pieces
Instead of spending money on expensive new furniture, consider upcycling the pieces you already own. Whether it’s an old dresser, coffee table, or bookshelf, a fresh coat of paint and a little creativity can turn your outdated furniture into a stylish focal point.
Materials you’ll need:
- Sandpaper
- Paint or stain
- Paintbrushes or rollers
- New hardware (optional)
- Wood filler (optional)
How-to:
- Prep the furniture: Start by sanding the furniture to remove any old paint or varnish. This will help the new paint adhere better. If there are any scratches or dents, fill them in with wood filler.
- Paint or stain: Choose a paint or stain color that complements the room’s color palette. Matte, chalky finishes give a rustic look, while a glossy finish creates a more modern vibe. Apply two to three coats of paint for even coverage.
- Change the hardware: If your furniture has outdated knobs or handles, swapping them for something more modern or stylish can completely change its appearance.
- Seal the finish: Once the paint has dried, seal it with a clear finish to protect the surface. This will help maintain the piece’s durability and keep it looking fresh.
Upcycling furniture is a fantastic way to not only save money but also to create custom pieces that perfectly fit your space and style.
3. DIY Floating Shelves: Stylish Storage and Display Solutions
Floating shelves are both functional and decorative, offering a sleek storage solution while providing a place to showcase your favorite items. Whether you’re displaying plants, books, or framed photos, floating shelves add a modern touch to any room.
Materials you’ll need:
- Wood planks (choose a size based on the space)
- Floating shelf brackets (or DIY your own)
- Screws
- Drill
- Level
How-to:
- Measure the space: Decide where you want to install your floating shelves. Measure the length of the space to ensure your shelves fit properly.
- Install the brackets: Install floating shelf brackets onto the wall, making sure they are level. Use screws to secure the brackets in place.
- Place the wood: Once the brackets are secure, place the wood on top of the brackets. If necessary, screw the shelf into place for added stability.
- Style the shelves: Now comes the fun part—decorating the shelves! Add plants, books, candles, or framed artwork. Arrange the items in an aesthetically pleasing way, varying heights and sizes for visual interest.
Floating shelves are a great way to display decorative items while keeping your space organized and clutter-free.
4. DIY Throw Pillows: Cozy Up Your Sofa with Custom Cushions
Throw pillows can instantly update a room, adding color, texture, and comfort. Making your own allows you to create pillows that match your existing decor and personal style.
Materials you’ll need:
- Fabric (choose a color or pattern that complements your room)
- Pillow inserts (or stuffing)
- Needle and thread (or sewing machine)
- Scissors
How-to:
- Cut the fabric: Measure and cut two pieces of fabric to the size of your pillow insert. Leave a small seam allowance for sewing.
- Sew the pillow: Place the fabric pieces together with the right sides facing each other. Sew along the edges, leaving one side open for inserting the pillow form.
- Insert the pillow: Turn the fabric right side out, then insert the pillow insert or stuffing. Once the pillow is full, sew the opening closed.
- Decorate and display: Add pom-poms, tassels, or embroidery to give the pillow a unique touch. Place the pillows on your sofa, bed, or chairs for a cozy and stylish addition to your space.
Making your own throw pillows is a simple and inexpensive way to add character to any room, and you can switch them out seasonally for a fresh look.
5. Mason Jar Lighting: Illuminate Your Space with a Rustic Touch
Mason jar lighting is a charming way to add warmth and ambiance to your home. You can create pendant lights, sconces, or even chandeliers using mason jars and basic lighting supplies.
Materials you’ll need:
- Mason jars
- Pendant light kits (available at most hardware stores)
- Drill with a hole saw attachment
- Light bulbs
- Wire or chain for hanging
How-to:
- Prepare the mason jars: Use a drill to create a hole in the lid of the mason jar. The hole should be large enough to fit the pendant light kit through.
- Install the light kit: Thread the pendant light kit’s cord through the hole in the lid. Attach the light bulb to the socket and screw the lid back onto the mason jar.
- Hang the lights: Use wire or chain to suspend the mason jars from the ceiling. Arrange them in a cluster for a statement lighting feature or hang them individually for a more subtle look.
Mason jar lighting adds a rustic, farmhouse feel to your home while providing soft, warm light.
6. Custom Wall Mirrors: Reflect Your Style with Unique Frames
Mirrors not only make a space appear larger and brighter, but they can also act as a statement piece of decor. DIY wall mirrors give you the opportunity to create a design that perfectly complements your home.
Materials you’ll need:
- Mirror (purchased or repurposed)
- Wood or cardboard for the frame
- Glue gun or nails
- Paint or stain
- Decorative accents (optional)
How-to:
- Create the frame: Measure and cut the wood or cardboard to fit around the mirror. You can make the frame as simple or as intricate as you like, depending on your style. For a rustic look, go for weathered wood, or use sleek, modern materials for a more contemporary vibe.
- Attach the frame: Use a glue gun or nails to attach the frame to the mirror. If you’re using cardboard, be sure to reinforce the edges to prevent bending.
- Paint or decorate: Once the frame is secure, paint or stain it to match your room’s color scheme. Add decorative elements such as gold leaf, beads, or fabric for extra flair.
- Hang the mirror: Once the frame is dry, hang the mirror on the wall. The reflective surface will brighten the room and make it feel more spacious.
Custom wall mirrors are an excellent way to showcase your DIY skills while enhancing your space.
7. DIY Wall Hooks: Organize with Style
Wall hooks are not only practical but can also be a stylish addition to your decor. From hanging coats and bags to displaying accessories, DIY wall hooks are a functional and decorative project.
Materials you’ll need:
- Wooden board or a piece of scrap wood
- Hooks (metal, wood, or ceramic)
- Screws and a drill
- Paint or stain (optional)
How-to:
- Prepare the board: Sand the board smooth and paint or stain it to match your room’s aesthetic.
- Install the hooks: Mark where you want each hook to go, then drill pilot holes and screw the hooks into place.
- Mount the board: Attach the board to the wall using screws or a hanging kit, depending on the weight of the hooks and items you plan to hang.
DIY wall hooks are a great way to keep your home organized while adding an artistic touch to your walls.
8. Decorative Vases: Add Flair with Custom Flower Holders
Vases are a staple in home decor, and making your own allows you to create something unique that matches your style. You can repurpose old containers or create entirely new ones using inexpensive materials.
Materials you’ll need:
- Empty glass jars, bottles, or containers
- Paint or washi tape
- Decorative elements (twine, beads, or fabric)
- Flowers or greenery
How-to:
- Prepare the container: Clean the jar or bottle thoroughly and remove any labels.
- Decorate: Use paint to cover the outside of the jar, or wrap it in twine or fabric for a rustic look. You can also add beads or metallic accents for extra flair.
- Fill with flowers: Once your vase is decorated, fill it with fresh or artificial flowers. For a more natural look, greenery such as eucalyptus or ivy works well.
- Display: Place the vase on your dining table, mantle, or windowsill for an instant pop of decor.
DIY decorative vases are an easy way to refresh your space with seasonal flowers or other decorative elements.
9. Customized Picture Frames: Display Your Memories in Style
A great way to showcase your family photos or artwork is with customized picture frames. You can make frames that reflect your personal taste and match the decor of any room.
Materials you’ll need:
- Wood or cardboard
- Glue or nails
- Paint or stain
- Decorative elements (ribbon, fabric, beads)
How-to:
- Prepare the frame: Cut the wood or cardboard to the desired size for your photo. Sand the edges smooth.
- Decorate: Paint or stain the frame to fit your style. You can also decorate with beads, ribbon, or fabric for added texture.
- Insert the photo: Once the frame is dry, insert your photo and secure it in place.
Customized picture frames are a perfect way to display cherished memories in a way that complements your home’s decor.
10. Macramé Wall Hangings: Add Boho Vibes to Your Home
Macramé wall hangings add a touch of bohemian style to any room. These handmade pieces create a relaxed atmosphere and can be customized to fit your space’s color scheme and size.
Materials you’ll need:
- Macramé cord or rope
- Wooden dowel or branch
- Scissors
- Beads or other decorative elements (optional)
How-to:
- Cut the cords: Measure and cut the macramé cords to the desired length for your project.
- Tie knots: Use basic macramé knots, such as the square knot or lark’s head knot, to create patterns in the cord.
- Add beads: Incorporate beads or other decorative elements for extra flair.
- Hang the piece: Once your macramé design is complete, hang it on the wall using a wooden dowel or branch.
Macramé wall hangings bring texture and depth to a space, making them a perfect DIY decor project for a boho-inspired home.
Conclusion
Transforming your space doesn’t have to require a large budget or professional help. With these 10 DIY home decor ideas, you can refresh your home with your personal touch, all while staying within budget. Whether you’re upcycling furniture, crafting custom artwork, or creating functional decor like floating shelves and hooks, these projects will help you create a home that’s uniquely yours.
The best part about DIY home decor is that it allows you to get creative, experiment with different styles, and make your space feel truly one-of-a-kind. So, grab your tools and materials, and get started on your next DIY project today!