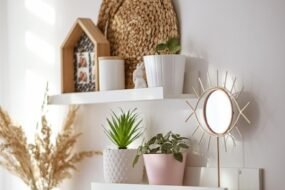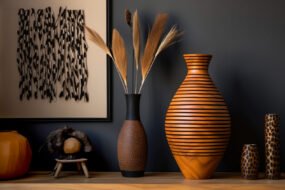
Whether you’re renting or own your home, one of the most exciting aspects of homeownership (or renting) is the ability to personalize and design your space. But creating a stylish, functional, and welcoming environment doesn’t have to mean breaking the bank. With DIY decor and design ideas, you can make dramatic changes to any room, transforming it from ordinary to extraordinary—all on a budget.
In this blog post, we’ll explore a range of DIY decor and design ideas for every part of your home. From the living room to the kitchen, bedroom to bathroom, there are simple yet effective ways to refresh your space, express your personality, and create a functional design that works for you.
Let’s dive into these creative DIY decor and design ideas that will inspire you to transform your space!
1. Statement Wall Art: Make Your Walls Pop
Walls are one of the largest canvases in your home, and blank walls are an opportunity waiting to be filled with personality. A well-thought-out statement piece or gallery wall can completely change the mood and style of a room. The good news is that you don’t have to spend a fortune on artwork or framed prints.
DIY Canvas Art
Creating your own abstract or geometric art is a fun, affordable, and customizable way to add style to your walls. You can make a simple yet stunning piece of art with just a few materials.
- Materials: Canvas, acrylic paints, brushes, painter’s tape.
- How-To: Use painter’s tape to create geometric patterns or lines on a blank canvas. Then, fill in each section with different colors of acrylic paint. Once the paint is dry, carefully remove the tape to reveal clean lines and striking designs.
Tip: If you’re not sure which colors to choose, look at the color palette of your room and pick tones that complement the existing decor.
Gallery Wall with Personal Touches
A gallery wall can display a mix of framed photos, prints, and artwork, creating a focal point in any room. It’s easy to make and personalize, plus it allows you to showcase different art styles, colors, and personal mementos.
- Materials: Frames, photos, art prints, prints from the internet, art supplies.
- How-To: Start by arranging your frames on the floor before committing to a layout. Mix frame sizes for an eclectic look, or opt for uniform sizes for a more cohesive feel. Once you’ve found the right arrangement, mark where the frames will go on the wall and hang them using picture hooks.
Tip: For a modern touch, consider printing black-and-white photographs or minimal art prints to create an elegant contrast.
2. Refresh Your Furniture with Paint and Upholstery
Upcycling your existing furniture is a cost-effective way to give your home a new look. Instead of spending money on new pieces, consider giving your current furniture a makeover with paint or new upholstery. It’s surprisingly easy to update old chairs, tables, or dressers with some elbow grease and creativity.
Chalk Paint for a Shabby Chic Look
Chalk paint is a favorite choice for transforming old furniture. Its matte finish and smooth texture give pieces a vintage or rustic look. You can use it on wood, metal, or even glass for a quick and beautiful update.
- Materials: Chalk paint, paintbrush, sandpaper, wax or clear sealant.
- How-To: Start by cleaning and lightly sanding the piece of furniture. Apply a coat of chalk paint with a brush, and let it dry completely. For a more distressed look, lightly sand areas to reveal the original wood. Finish with a clear wax or sealant to protect the finish.
Tip: For a more modern aesthetic, use a neutral color palette like gray, white, or navy. You can also add some gold or brass accents for an added touch of luxury.
Reupholster Old Chairs or Cushions
Reupholstering chairs or cushions can breathe new life into old furniture. Choose fabric that complements your room’s decor and gives the piece a fresh, updated appearance.
- Materials: Fabric, staple gun, scissors, screwdriver (if needed).
- How-To: Remove the old fabric from the chair by unscrewing it (or removing any staples). Cut the new fabric to size, leaving a few extra inches on each side. Secure the fabric with a staple gun, pulling it tight as you go. Once finished, reassemble the chair and enjoy its new look.
Tip: Consider using patterned fabric or leather for an elegant, durable finish. Opt for a bold print if you want the chair to be the statement piece in your room.
3. Revamp Your Lighting Fixtures
Lighting is essential for creating ambiance in any room, and upgrading or changing your light fixtures is an easy and affordable way to transform your space. From pendant lights to floor lamps, simple lighting changes can have a huge impact on your home’s design.
Install Pendant Lights
Pendant lights are a chic and functional way to add modern style to your home, especially in the kitchen, dining room, or entryway. They come in a variety of styles, from minimalist and industrial to more decorative designs.
- Materials: Pendant light fixtures, electrical tools, drill, measuring tape.
- How-To: Turn off the electricity at the circuit breaker before starting. Use a measuring tape to determine where the lights will go. Mark and drill holes for the mounting hardware, then connect the electrical wiring, securing the fixture to the ceiling.
Tip: Consider mixing and matching different pendant light styles for an eclectic, boho vibe or opt for a set of identical lights for a more cohesive, modern look.
DIY Floor Lamps
If you love DIY projects, building your own floor lamp can be an interesting and rewarding endeavor. Whether you’re using a repurposed item or building it from scratch, you’ll have full control over the style, size, and design.
- Materials: Lamp kit, wooden dowels or piping, base (could be a large vase or bowl), lamp shade.
- How-To: Assemble your lamp by attaching the lamp kit to the base, connecting the dowels or pipes to form the body of the lamp, and wiring the kit. Add a lamp shade for style and functionality.
Tip: Opt for a sleek metal frame for a modern look, or use a more rustic, natural wood frame for a boho or farmhouse-inspired design.
4. Add Personality with DIY Throw Pillows and Curtains
Textiles are a quick and easy way to add color, texture, and comfort to any room. Making your own throw pillows or curtains allows you to bring in unique patterns and materials that reflect your personal style.
Custom Throw Pillows
Throw pillows are perfect for updating your sofa, chairs, or bed. You can sew or no-sew your own pillow covers using fabric in any pattern or color that suits your space. This is a simple DIY project that has a big impact.
- Materials: Fabric, pillow inserts, sewing machine or fabric glue, scissors, sewing pins.
- How-To: Cut your fabric to the size of the pillow insert, leaving an extra inch for seams. Sew the sides together, leaving one side open for the insert. Turn the fabric right-side out, stuff with a pillow insert, and sew the last side shut.
Tip: If you don’t know how to sew, use fabric glue instead. Simply fold and glue the edges, then attach a decorative button or trim for extra flair.
DIY Curtains for a Custom Look
Curtains can completely change the vibe of a room, whether you want something light and airy or bold and dramatic. Making your own curtains gives you the ability to select your fabric and customize the length and style.
- Materials: Fabric, curtain rings or rods, scissors, sewing machine (or fabric glue).
- How-To: Measure the height and width of your windows, then cut your fabric accordingly. If you’re sewing, create a hem along the edges and a casing for the curtain rod. If you’re using fabric glue, simply fold the edges and glue them to create the hems and casing.
Tip: For a more luxurious look, consider adding lining to your curtains for a more polished, high-end appearance.
5. DIY Storage Solutions for a Clutter-Free Home
Organization is key to creating a space that is both functional and aesthetically pleasing. DIY storage solutions allow you to create practical storage while also adding charm and character to your home.
Create Floating Shelves
Floating shelves are an easy way to add extra storage or display space without taking up floor space. They can hold anything from books to plants to knick-knacks, and they add a sleek, modern look to any room.
- Materials: Wooden planks, shelf brackets, screws, drill, level.
- How-To: Mark where you want the shelves to go and use a level to ensure the brackets are straight. Drill holes for the brackets, then secure them to the wall. Place the wooden shelves on top of the brackets, and use screws to keep them in place.
Tip: Consider painting or staining the wood to match your room’s color palette or for a more rustic appearance.
Repurpose Old Furniture for Storage
Repurposing old furniture into functional storage units is a great way to keep your home organized while also being creative. You can turn old crates into bookshelves, a vintage ladder into a towel rack, or an old trunk into a coffee table with hidden storage.
- Materials: Old furniture or wooden crates, paint or stain, screws, toolbox.
- How-To: Repurpose furniture by cleaning it up, adding a fresh coat of paint, and adjusting it to suit your needs. For example, transform a wooden crate into a small bookshelf or stack several to create a unique coffee table with built-in storage.
Tip: To add personality, paint the pieces in bold, vibrant colors or distress them for a more vintage, shabby chic look.
6. Add Greenery with Indoor Plants
Plants are an affordable way to bring life, color, and texture into your home. Whether you opt for low-maintenance succulents, leafy ferns, or vibrant flowering plants, adding greenery enhances both the aesthetic and air quality of your space.
DIY Plant Holders
Create custom plant holders from repurposed materials like old jars, baskets, or wooden crates. Not only is this a fun DIY project, but it also allows you to add personal style to your plant displays.
- Materials: Jars, twine, plant pots, paint, glue.
- How-To: For a simple look, wrap twine around a jar and place your plant inside. If you want a more elaborate design, use wooden crates or create hanging planters from macrame.
Tip: Arrange your plants at different heights on shelves or hanging from the ceiling to create an eye-catching display.
Conclusion
DIY decor and design projects offer an affordable and creative way to transform your home. Whether you’re looking to refresh your walls with statement art, upcycle old furniture, improve your lighting, or add functional storage solutions, there are endless possibilities for personalizing your space.
By using simple materials, a bit of time, and some creativity, you can completely change the feel of a room and make it your own. With these DIY ideas, you’ll create a home that not only reflects your personal style but also meets your functional needs—without breaking the bank.
Happy decorating and designing your dream home!
This blog post provides a comprehensive list of DIY ideas and step-by-step instructions to help readers make lasting, personalized changes in their homes. Whether it’s through wall art, furniture updates, or unique lighting, the options are endless!


