Whether you’re moving into a new home or just want to give your current space a makeover, refreshing your home’s decor doesn’t have to mean spending a fortune. With a little creativity, time, and effort, you can transform your space into a stylish and welcoming haven without breaking the bank.
In this post, we’ll share 10 easy DIY decor and design ideas that will instantly refresh your home. From budget-friendly wall art to stylish furniture upgrades, these simple yet impactful projects will help you elevate your home’s design while staying within your budget.
1. Create a Statement Wall with Peel-and-Stick Wallpaper
Wallpaper is back in style, but not in the way your grandmother used it. Modern peel-and-stick wallpaper is an easy, removable solution that lets you create bold statement walls without the hassle of traditional wallpaper installation. Whether you go for a trendy geometric print, a floral pattern, or a faux brick effect, peel-and-stick wallpaper is a simple way to update a room.
Why Try It?
- Instant impact with minimal effort
- No mess or glue to deal with
- Removable if you want to change it later
What You Need:
- Peel-and-stick wallpaper (choose a pattern or color that suits your room)
- Scissors or a utility knife
- A smooth surface for application (ensure the wall is clean and dry)
- A ruler or measuring tape
How to Make It:
- Start by measuring the area you want to cover.
- Cut the wallpaper to size, leaving a little extra around the edges for trimming.
- Peel off the backing paper and apply the wallpaper to the wall, starting from the top and working your way down.
- Use a ruler or smoothing tool to eliminate any air bubbles.
- Trim the excess around the edges with a utility knife for a clean finish.
A statement wall can work in almost any room—living rooms, bedrooms, kitchens, or even bathrooms. The best part is you can change it whenever you like!
2. Upcycle Old Furniture with Paint
One of the quickest and most cost-effective ways to refresh a room is to give your old furniture a makeover with paint. Whether it’s a dresser, side table, or even a set of dining chairs, a fresh coat of paint can give any piece of furniture a completely new life. You can also add distressing techniques or patterns to make the piece truly unique.
Why Try It?
- Affordable way to refresh old furniture
- Personalize furniture to match your room’s decor
- Allows you to get creative with color, texture, and finishes
What You Need:
- Chalk paint or furniture paint
- Painter’s tape
- Sandpaper (optional, if you want to distress the piece)
- Paintbrushes and a paint tray
- Drop cloth or old newspaper for covering surfaces
How to Make It:
- Start by sanding down the surface to remove any previous paint or varnish (if necessary).
- Clean the furniture thoroughly to ensure it’s dust-free.
- Apply a coat of chalk paint or furniture paint to the entire surface.
- Let it dry, then apply a second coat if needed.
- Once dry, distress the edges with sandpaper for a shabby chic look (optional).
- Finish with a clear topcoat for added durability.
Transforming an old, outdated piece of furniture into something new and stylish is a simple yet satisfying DIY project that can refresh any room.
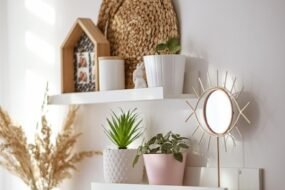
3. DIY Floating Shelves for Extra Storage
Floating shelves are a practical and stylish way to add both storage and design interest to any room. You can display books, photos, plants, or decorative objects without taking up floor space. Best of all, floating shelves are simple to make and install.
Why Try It?
- Maximize vertical space in small rooms
- Customizable size and design
- Adds a sleek, modern touch to any room
What You Need:
- Wood boards (cut to size)
- Shelf brackets (or wood to make your own)
- Screws and a drill
- Sandpaper and paint or stain (optional)
How to Make It:
- Measure and mark where you want your shelves to go on the wall.
- Cut the wood to your desired length and sand the edges smooth.
- If you’re using wood brackets, measure and cut them to the correct size and shape.
- Paint or stain the wood for a finished look.
- Install the brackets onto the wall using screws, then place the shelves on top.
- Secure the shelves in place with screws from the underside.
Floating shelves are a great way to display your favorite things and add a modern, minimalist touch to your home decor.
4. Make a Custom Area Rug with Fabric
If you’re looking for an affordable way to refresh your floor space, a custom DIY rug could be the answer. Using fabric and a non-slip rug pad, you can create a rug that’s the perfect size, color, and texture for your space. Plus, it’s a great way to incorporate patterns and colors that complement your existing furniture.
Why Try It?
- Customizable size and design
- Great for creating an accent piece in any room
- Easy to clean and maintain
What You Need:
- Fabric (choose a durable, washable material like canvas, burlap, or cotton)
- Non-slip rug pad
- Scissors
- Hot glue gun or fabric adhesive
How to Make It:
- Measure the size of the area where you want to place your rug and cut the fabric accordingly.
- If you want to add a border, cut additional fabric to create a trim around the edges.
- Attach the fabric to the non-slip rug pad using a hot glue gun or fabric adhesive.
- Fold the edges of the fabric over and glue them in place for a clean finish.
- Let it dry, then place the rug in your desired location.
A custom fabric rug is an easy way to add a pop of color and pattern to your room, and it’s a perfect weekend project.
5. Create Unique Wall Art with Canvas and Paint
Custom artwork can be expensive, but you can create your own stunning wall art using inexpensive materials like canvases and acrylic paints. You don’t need to be an artist to make beautiful art—abstract designs, geometric shapes, or even a splash of color can add personality to your walls.
Why Try It?
- Personalized, one-of-a-kind decor
- Easy and fun to make, even for beginners
- A creative way to express yourself
What You Need:
- Blank canvas or wood panel
- Acrylic paints in various colors
- Paintbrushes (various sizes)
- Painter’s tape (for geometric designs)
How to Make It:
- Start by painting your canvas with a base color or leave it white for a more minimalist look.
- Use painter’s tape to create geometric designs, or freehand abstract patterns with different colors.
- Layer the paint, allowing it to dry between coats if needed, and experiment with textures or brushstrokes.
- Once dry, hang your new artwork on the wall and enjoy!
This DIY project is an easy way to add your personal touch to any room, and it’s a perfect craft for relaxing while getting creative.
6. Repurpose Old Windows as Wall Decor
Repurposing old windows is a fantastic way to add rustic charm to your home. With a little creativity, you can turn an old window frame into a beautiful piece of wall art or even a functional mirror.
Why Try It?
- Eco-friendly and budget-friendly
- Adds rustic, vintage flair to your home
- Customizable to fit your space and style
What You Need:
- Old window frame (found at thrift stores, antique shops, or your own home)
- Sandpaper (if you want to distress the wood)
- Paint or stain (optional)
- Mirror backing (optional, if making a mirror)
- Hanging hardware (if you plan to hang it)
How to Make It:
- Clean the window frame and sand it down if you want to distress it.
- Paint or stain the frame in a color that suits your decor.
- If you want to make a mirror, take the measurements of the window’s panes and order a mirror backing to fit.
- Alternatively, you can leave the glass as is and decorate the window with photos or artwork placed behind the panes.
- Add hanging hardware to the back for easy installation on your wall.
Repurposing old windows as wall decor is a fantastic way to bring character to your home while also being eco-conscious.
7. DIY Decorative Throw Pillows
Throw pillows are an easy way to change up the look of a room. By making your own, you can ensure they match your exact style and fabric preferences. Plus, sewing or hot-gluing your pillows is a simple and inexpensive DIY project.
Why Try It?
- Adds comfort and style to your furniture
- Customize the design and fabric to suit your room
- Easy to make, even without sewing experience
What You Need:
- Pillow inserts or old throw pillows
- Fabric (choose a durable cotton or linen)
- Sewing machine or fabric glue
- Scissors
- Decorative embellishments (optional, such as tassels or buttons)
How to Make It:
- Measure your pillow insert and cut two squares of fabric, adding an extra inch for seam allowance.
- If sewing, sew three sides of the fabric together, then insert the pillow and sew the remaining side shut. Alternatively, use fabric glue to seal the edges.
- Add any decorative embellishments you like, such as tassels, fringe, or buttons.
- Place the new pillows on your sofa, bed, or chair to add a pop of color and texture.
Homemade throw pillows are an easy way to refresh your space with little time and effort.
8. Create a Stylish Gallery Wall
Gallery walls are a great way to showcase your favorite art, photos, and memories. Creating a gallery wall doesn’t have to be expensive—mix framed prints with inexpensive DIY art, family photos, and even fabric swatches to curate a collection that reflects your personal style.
Why Try It?
- Easy to personalize with your favorite pieces
- A great way to fill large, empty walls
- Affordable when using a mix of low-cost art and frames
What You Need:
- Various frames (mix different sizes and styles for interest)
- Photos, artwork, or fabric swatches
- Level and measuring tape (for placement)
- Nails and picture hangers
How to Make It:
- Choose a wall that you want to turn into a gallery space.
- Lay out your art and frames on the floor to experiment with different arrangements before hanging.
- Use a level and measuring tape to ensure your frames are hung evenly.
- Arrange your frames in a grid or a more organic pattern for a unique look.
- Hang your frames and step back to admire your work!
A gallery wall adds a personal and artistic touch to any room, and it’s one of the easiest ways to refresh your space without spending a lot of money.
9. DIY Hanging Planters
If you’re a plant lover, hanging planters are a stylish way to bring greenery into your home while saving space. With a little rope, macrame cord, or even old fabric, you can create beautiful hanging planters for your favorite houseplants.
Why Try It?
- Adds a natural, fresh vibe to your home
- Saves space in smaller rooms
- Customizable design to suit your decor
What You Need:
- Rope, macrame cord, or fabric strips
- Plant pots or mason jars
- Hooks or hanging hardware
- Scissors
How to Make It:
- Cut the rope or cord into several equal lengths.
- Tie knots in the cord to create a net or cradle to hold the plant pot.
- Attach hooks to the ceiling or use a curtain rod for hanging.
- Place your plant pot in the macrame holder and hang it up.
Hanging planters are a simple and effective way to add a touch of nature to your space.
10. DIY Rustic Wood Sign
Wooden signs with inspirational quotes, family names, or even simple designs can add rustic charm to your home. Creating your own sign is an easy DIY project, and you can personalize it with your favorite words or designs.
Why Try It?
- Easy to make and personalize
- Adds warmth and character to your space
- Perfect for rustic, farmhouse, or cozy-style homes
What You Need:
- Wooden board or pallet
- Sandpaper
- Paint, stain, or markers
- Stencils or vinyl letters (optional)
How to Make It:
- Sand the wood to smooth any rough edges.
- Paint the wood with a base coat of stain or paint.
- Once dry, use stencils or freehand your design onto the wood.
- Let the paint dry completely, then hang or display your sign.
A rustic wood sign is a great way to bring personality and warmth into any room.
Conclusion
You don’t need a big budget to refresh and transform your home’s decor. With these 10 easy and affordable DIY projects, you can add style, personality, and functionality to your living space. From upcycling old furniture to creating custom artwork, the possibilities are endless. Best of all, these projects can be done over a weekend, giving you a chance to express your creativity and make your home a reflection of your unique taste.
So grab your tools, gather your supplies, and get started on your next home makeover project today!
Happy DIY-ing!