Welcome to our ultimate guide for DIY decor! If you’re looking to refresh your living space without a hefty price tag, you’re in the right place. Whether you’re a seasoned DIY enthusiast or just starting out, these ten creative projects will help you transform your home into a stylish sanctuary. Let’s get started!
1. Gallery Wall
Overview
A gallery wall is a fantastic way to showcase your personality and interests. It adds visual interest and can serve as a focal point in any room. The best part? You can customize it endlessly!
Steps to Create a Gallery Wall
- Select Your Wall: Choose a space that can handle the attention—a hallway, above a sofa, or in your home office.
- Gather Artwork: Collect a variety of frames, photos, and art pieces. Mix sizes and styles for an eclectic feel. Consider including prints, family photos, and even children’s art.
- Lay It Out: Before hanging, arrange your pieces on the floor to find a layout you love. Play with spacing until it feels balanced.
- Hang the Frames: Use a level and measuring tape to ensure your frames are evenly spaced. Start with the center piece and work outward.
- Add Finishing Touches: Consider adding shelves or decorative elements like plants or small sculptures to enhance the display.
Tips
- Use command strips for an easy, no-damage hanging solution.
- Incorporate personal items like travel souvenirs or artwork created by you or your loved ones.
2. DIY Floating Shelves
Overview
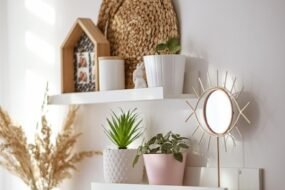
Floating shelves are both functional and stylish, perfect for displaying books, plants, or decor items without taking up floor space.
Steps to Create Floating Shelves
- Select Your Materials: You can use wood boards or reclaimed wood for a rustic look. Choose a finish that matches your decor.
- Measure and Cut: Determine the size of your shelves based on available wall space and cut the wood accordingly.
- Install Brackets: Attach hidden brackets to the wall using a level to ensure they are straight. Make sure to secure them into wall studs for stability.
- Place Your Shelves: Slide the wood boards onto the brackets and secure them in place.
- Style Your Shelves: Arrange your items in a visually pleasing way. Use books, plants, and decorative objects for a curated look.
Tips
- Vary the height of your items to create interest.
- Consider adding LED strip lights underneath for a modern touch.
3. Upcycled Furniture
Overview
Give new life to old furniture with a little creativity. Upcycling not only saves money but also contributes to sustainability.
Steps for Upcycling Furniture
- Choose Your Piece: Look for items that have good bones but may need some love—a dresser, chair, or table.
- Clean and Sand: Prepare your furniture by cleaning it thoroughly and sanding any rough spots.
- Paint or Stain: Decide whether you want a fresh coat of paint or a new stain. Use a primer if you’re painting over a dark color.
- Add New Hardware: Replace old knobs and handles with stylish alternatives to give your piece a modern update.
- Style and Place: Once your furniture is complete, style it with decor items that complement your new look.
Tips
- Experiment with different painting techniques, like distressing or stenciling, for added character.
- If you’re unsure, start with smaller items like side tables or chairs before tackling larger pieces.
4. Textile Revamp
Overview
Soft furnishings can completely change the feel of a room. Refresh your textiles for a quick and impactful update.
Steps for a Textile Revamp
- Assess Your Fabrics: Look at your curtains, cushions, and throws. Determine what needs to be replaced or updated.
- Choose New Fabrics: Select colors and patterns that enhance your existing decor. Don’t be afraid to mix and match!
- Sew or Update: If you’re handy with a sewing machine, consider making your own cushion covers or curtains. If sewing isn’t your thing, look for fabric glue as an alternative.
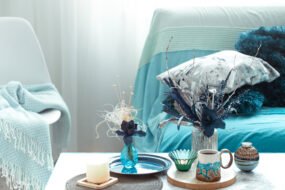
- Accessorize: Layer different textures and patterns for depth. Consider adding a chunky knit throw or some decorative pillows for added comfort.
- Rotate Seasonally: Keep your decor fresh by rotating textiles seasonally. Light fabrics for summer and cozier options for winter can transform the space.
Tips
- Use removable fabric covers on cushions for easy cleaning.
- Don’t shy away from bold colors or patterns—they can become statement pieces!
5. Mood Lighting
Overview
Lighting sets the mood for any space. Create warm, inviting environments with DIY lighting solutions.
Steps for Creating Mood Lighting
- Assess Your Space: Identify areas that need additional lighting, like reading nooks or dining areas.
- Choose Light Fixtures: Look for pendant lights, table lamps, or wall sconces that fit your style. You can even create your own with simple materials.
- Install or Assemble: If you’re creating a fixture, follow the instructions carefully. Make sure to follow electrical safety guidelines.
- Use Dimmers: Install dimmer switches to control the brightness and create different atmospheres depending on the time of day.
- Incorporate Decorative Bulbs: Edison bulbs or colored LEDs can enhance the aesthetic of your space.
Tips
- Layer lighting with a combination of overhead, task, and accent lights for a well-rounded effect.
- Experiment with string lights for a cozy ambiance, especially in bedrooms or outdoor spaces.
6. Accent Walls
Overview
An accent wall can transform a room and serve as a beautiful backdrop for furniture or artwork.
Steps to Create an Accent Wall
- Choose Your Wall: Select a wall that naturally draws attention—like the wall behind a sofa or bed.
- Select Your Technique: Options include paint, wallpaper, or wood paneling. Consider what will work best for your space.
- Prep the Wall: Clean and repair any imperfections on the wall before starting.
- Apply Your Choice: If painting, use painter’s tape to create clean lines. If using wallpaper, carefully follow the application instructions.
- Style Around It: Once your accent wall is complete, arrange furniture and decor that complements the new look.
Tips
- Bold colors can create drama, while soft colors can offer a subtle effect.
- Use removable wallpaper if you want to change things up frequently.
7. DIY Rugs
Overview
Rugs can define a space and add warmth. Making your own allows you to customize the size and style to fit your home perfectly.
Steps to Create a DIY Rug
- Select Your Materials: Use fabric scraps, old towels, or even jute for a natural look.
- Determine the Size: Measure the area where the rug will go to decide on dimensions.
- Cut and Assemble: If using fabric, cut it into desired shapes and sizes. Sew or glue the pieces together.
- Finish Edges: To prevent fraying, use fabric glue or sew a hem around the edges.
- Style Your Rug: Place your new rug in a strategic spot to enhance the room’s functionality and aesthetics.
Tips
- Consider a no-sew method using fabric glue for a quicker project.
- Experiment with shapes—round, square, or runner rugs can all create different vibes.
8. Nature-Inspired Decor
Overview
Bringing the outdoors in can refresh your space and improve your mood. Incorporate natural elements into your decor.
Steps for Nature-Inspired Decor
- Gather Natural Materials: Collect branches, stones, or dried flowers from your surroundings.
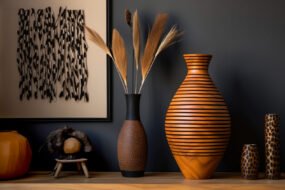
- Create Centerpieces: Use branches as a striking centerpiece or fill a vase with pebbles and greenery for an eye-catching display.
- Incorporate Plants: Add indoor plants or herbs to improve air quality and bring life into your home.
- Make Wall Art: Create artwork using pressed flowers or leaves in a frame for a natural touch.
- Decorate with Natural Textiles: Use linen or cotton fabrics for curtains, cushion covers, and table linens.
Tips
- Choose low-maintenance plants if you’re not a seasoned gardener.
- Use natural wood or stone accents for a cohesive look.
9. Chalkboard Paint
Overview
Chalkboard paint is a versatile and fun way to create interactive decor elements. It’s perfect for kitchens, kids’ rooms, or home offices.
Steps for Using Chalkboard Paint
- Select Your Surface: You can use it on walls, furniture, or even on canvas.
- Prep the Area: Clean and tape off areas you don’t want to paint.
- Apply the Paint: Use a brush or roller to apply chalkboard paint in even strokes. Multiple coats may be necessary for full coverage.
- Cure the Surface: Once dry, season the surface by rubbing chalk all over and wiping it off. This helps prevent ghosting.
- Get Creative: Use colorful chalk to write messages, grocery lists, or draw designs.
Tips
- Use magnetic chalkboard paint for an even more functional surface.
- Don’t forget to stock up on colorful chalk for a playful touch!
10. Seasonal Decor Swaps
Overview
Keeping your decor fresh doesn’t have to be costly. Seasonal swaps can keep your space feeling new and exciting.
Steps for Seasonal Decor Swaps
- Assess Current Decor: Take stock of what you already have and identify items that could be updated for the season.
- Create a Seasonal Decor Box: Store items like garlands, centerpieces, and decor pieces that can be swapped out throughout the year.
- Incorporate Natural Elements: Use seasonal flowers, leaves, or even pinecones to enhance your decor.
- Change Fabrics: Switch out throws and pillows to reflect seasonal colors or textures.
- Update Centerpieces: Rotate your tabletop decor with seasonal themes—pumpkins in fall, flowers in spring, etc.
Tips
- Consider repurposing items from one season to another with a little creativity.
- Plan ahead for holidays so you can enjoy your seasonal decor to the fullest!
Final Thoughts
Decorating your home doesn’t have to be a daunting task or cost a fortune. With these ten DIY projects, you can transform your space into a stylish haven that reflects your personality and taste. So gather your supplies, unleash your creativity, and enjoy the process of making your home uniquely yours! Happy crafting!


