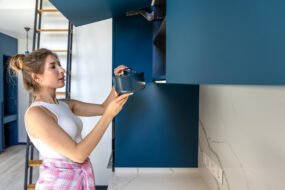
Transforming your home with DIY décor projects can be fun, affordable, and incredibly satisfying. Whether you’re a seasoned crafter or just getting started, there are plenty of easy-to-follow tutorials that can help you create a personalized and stylish space. In this guide, I’ll walk you through several step-by-step DIY home décor projects, ranging from simple wall art to upcycling furniture, and even making your own textiles. These tutorials are perfect for beginners and will allow you to add a personal touch to your home without breaking the bank.
1. DIY Painted Canvas Wall Art
Wall art is a great way to fill empty spaces and bring personality to any room. Creating your own abstract canvas art allows you to experiment with colors and textures while crafting something that perfectly complements your home décor.
Materials Needed:
- Blank canvas (any size)
- Acrylic paints in your preferred colors
- Paintbrushes (various sizes)
- Painter’s tape (optional for geometric designs)
- Drop cloth or old sheet to protect your workspace
Step-by-Step Instructions:
- Set Up Your Workspace: Lay down a drop cloth to protect your floor or table from paint splashes. Set up your canvas on an easel or place it flat on the cloth.
- Choose Your Colors: Select 3-5 colors that match your home’s color palette. Choose complementary shades for a harmonious look or opt for bold contrasts for something more dramatic.
- Apply the Base Layer: Begin by painting the entire canvas in a light color or base shade of your choice. This will serve as the foundation for your design.
- Create Shapes and Patterns: Once the base is dry, you can use painter’s tape to create geometric shapes on the canvas. If you prefer an abstract look, simply start painting brush strokes or patterns freehand. Play with layering colors and mixing textures.
- Add Finishing Details: Once you’ve filled the canvas with your design, allow the paint to dry completely. You can add final touches like small splatters, dots, or lines to give the artwork depth.
- Display: Hang your finished artwork on the wall and admire your custom-made, budget-friendly masterpiece!
This project allows you to get creative with minimal supplies and results in a statement piece of art that you can proudly say you made yourself.
2. DIY Floating Shelves
Floating shelves are a practical yet stylish way to display décor, plants, or books while also saving space. They are a perfect blend of form and function, and installing them is easier than you might think.
Materials Needed:
- Wooden boards (cut to your desired shelf size)
- Brackets (for hidden mounting or traditional metal brackets)
- Screws and wall anchors
- Drill and screwdriver
- Level
- Measuring tape
Step-by-Step Instructions:
- Measure and Mark the Wall: Use a measuring tape and pencil to mark where you want your floating shelves to go. Be sure to use a level to ensure they are straight.
- Install Brackets: If you’re using hidden brackets, attach them to the wall using screws and wall anchors. For traditional brackets, secure them to the wall first, then place the shelf on top.
- Mount the Shelves: Once the brackets are securely in place, rest the wooden boards on top and attach them to the brackets using screws. For hidden brackets, slide the shelf onto the mount.
- Style the Shelves: Once installed, decorate your floating shelves with plants, books, or small decorative items to personalize the look.
Floating shelves are a simple yet impactful way to add storage and display space in any room, from the kitchen to the living room.
3. DIY Upholstered Headboard
An upholstered headboard can instantly elevate the look of your bedroom, making it feel cozier and more luxurious. With some basic materials and tools, you can create a custom headboard that suits your style and adds a touch of elegance to your space.
Materials Needed:
- Plywood or MDF board (cut to the size of your bed)
- Upholstery foam
- Batting
- Fabric of your choice (enough to cover the headboard)
- Staple gun and staples
- Scissors
- Mounting hardware (D-ring hangers or French cleat)
Step-by-Step Instructions:
- Cut the Foam and Batting: Lay the plywood or MDF board on the floor and cut your foam to fit its size. Place the foam on the board, then cover it with batting.
- Staple the Batting: Pull the batting taut around the back of the board and staple it in place. Be sure to smooth out any wrinkles to create an even surface.
- Attach the Fabric: Lay your fabric over the batting-covered board. Pull the fabric tightly around the back and staple it to the board, just like you did with the batting. Make sure the fabric is smooth and wrinkle-free.
- Mount the Headboard: Once the fabric is securely stapled, attach D-ring hangers or a French cleat to the back of the headboard. Mount it to the wall at your desired height behind the bed.
- Enjoy Your New Headboard: Your custom upholstered headboard is now ready to transform your bedroom into a stylish and comfortable retreat.
4. DIY Rope Basket Storage
Stylish storage solutions are always in demand, and a DIY rope basket is both functional and decorative. Use it to store blankets, toys, or any household items you want to keep organized.
Materials Needed:
- Large bucket or old basket (to use as a base)
- Thick rope (enough to wrap around the entire basket)
- Hot glue gun and glue sticks
- Scissors
- Optional: Fabric liner
Step-by-Step Instructions:
- Prep Your Basket or Bucket: If you’re using a bucket or an old basket as the base, make sure it’s clean and dry. This will provide the structure for your rope basket.
- Attach the Rope: Starting at the bottom, apply hot glue in sections as you wrap the rope tightly around the basket. Press the rope into place as you go, ensuring it sticks firmly to the base.
- Continue Wrapping: Keep gluing and wrapping the rope around the basket until you reach the top. Cut off any excess rope and secure the end with extra glue.
- Add a Liner (Optional): If you want to give the basket a finished look, you can sew or insert a fabric liner inside the basket.
- Use Your Basket: Your stylish new rope basket is now ready to store anything from towels in the bathroom to toys in the living room.
This project is simple, functional, and adds a rustic touch to any space.
5. DIY Stenciled Accent Wall
Accent walls are a great way to add a pop of color or pattern to a room, but hiring a professional painter or wallpaper installer can be expensive. Instead, you can create your own stenciled accent wall for a fraction of the cost.
Materials Needed:
- Wall stencil (purchase or DIY)
- Paint (in your chosen color)
- Small paint roller or stencil brush
- Painter’s tape
- Drop cloth
Step-by-Step Instructions:
- Prepare the Wall: Clean the wall and ensure it’s free of dust and dirt. Lay down a drop cloth to protect your floor, and use painter’s tape to mask off any trim or edges.
- Position the Stencil: Place the stencil on the wall and secure it with painter’s tape. Make sure the stencil is level before you begin painting.
- Apply the Paint: Using a small roller or stencil brush, apply paint over the stencil. Be careful not to overload the brush or roller with paint to prevent smudging.
- Move the Stencil: Once the first section is complete, carefully remove the stencil and reposition it next to the painted area. Continue stenciling until the entire wall is covered.
- Let it Dry: Allow the paint to dry completely before removing the painter’s tape.
A stenciled accent wall can add visual interest and texture to your room, making it a standout feature without the cost of wallpaper or custom painting.
6. DIY Macramé Plant Hanger
Macramé is a fun and trendy craft that has made a huge comeback in home décor. A macramé plant hanger is not only stylish but also a great way to display plants in your home. It’s an ideal project for beginners, and you can customize it to fit any space.
Materials Needed:
- Macramé cord or thick cotton rope
- A metal or wooden ring
- Scissors
- Small potted plant
Step-by-Step Instructions:
- Cut the Cord: Cut four long pieces of macramé cord, each about 3-4 times the length of your desired plant hanger.
- Attach the Ring: Fold the cords in half and loop them through the metal or wooden ring, securing them with a lark’s head knot. You should now have eight strands hanging from the ring.
- Create Knots: Start making square knots or spiral knots with the cords. You can follow online tutorials for specific macramé knot techniques, but even basic knots will create a beautiful hanger.
- Form the Basket: Once you’ve made about 6-10 inches of knots, separate the cords into pairs and tie them together to form the bottom of the plant hanger.
- Add the Plant: Place your small potted plant in the macramé hanger, ensuring it’s securely supported by the knotted cords.
Hang your new macramé plant hanger in a sunny spot and enjoy the boho-chic look it adds to your home.
Conclusion: Get Crafty and Transform Your Space
These step-by-step DIY tutorials are perfect for anyone looking to update their home décor with personalized, creative projects. Each of these ideas is budget-friendly, easy to follow, and can be completed in a weekend. Whether you’re adding an accent wall, upgrading your bedroom with a custom headboard, or enhancing your storage options with stylish baskets, these DIY projects will help you create a home that reflects your personal style. So grab your tools, get inspired, and start transforming your space today!


