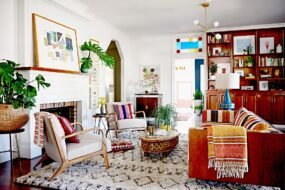
Decorating your home doesn’t have to be expensive. In fact, with some creativity and a few DIY projects, you can completely transform your space without breaking the bank. Whether you’re looking to add some personality to your living room, revamp your bedroom, or create stylish storage solutions, there are plenty of budget-friendly ideas you can tackle yourself. In this guide, we’ll explore various DIY home décor projects, covering everything from wall art to furniture makeovers. These projects are simple enough for beginners and affordable enough for any budget.
1. Create Custom Wall Art
One of the most effective ways to personalize your space is through wall art. DIY wall art allows you to showcase your creativity while adding a unique touch to your home.
Abstract Canvas Art
You don’t need to be a professional artist to create beautiful abstract art. With a blank canvas, some acrylic paint, and a little imagination, you can produce a stunning piece to hang in your living room or bedroom. Here’s how:
- Materials Needed: A blank canvas, acrylic paint (choose colors that match your room’s palette), paintbrushes, and painter’s tape (optional for geometric designs).
- Steps:
- Start by laying down a drop cloth or old sheet to protect your workspace.
- Use painter’s tape to create clean lines or shapes on the canvas if you want a geometric look.
- Dip your brush into your chosen paint color and begin creating broad strokes, dots, or splatters on the canvas.
- Once you’re satisfied with the design, allow the paint to dry completely before removing the tape.
- Hang your masterpiece on the wall to instantly enhance your décor.
DIY Photo Collage
A DIY photo wall collage is a fantastic way to add a personal touch to any room. You can use family photos, travel pictures, or even inspirational quotes.
- Materials Needed: Photo frames, printed photos, tape or photo corners (if you prefer a frameless look), and a level.
- Steps:
- Decide on the layout of your photo collage. You can create a symmetrical grid or a more random, organic arrangement.
- Print out your favorite photos, ensuring they are all of similar quality and tone to maintain a cohesive look.
- Arrange the photos on the floor first to plan your layout, then begin hanging them on the wall.
- Use a level to ensure your frames are straight, and adjust the spacing between each photo as necessary.
This project adds warmth and personality to your space, making it uniquely yours.
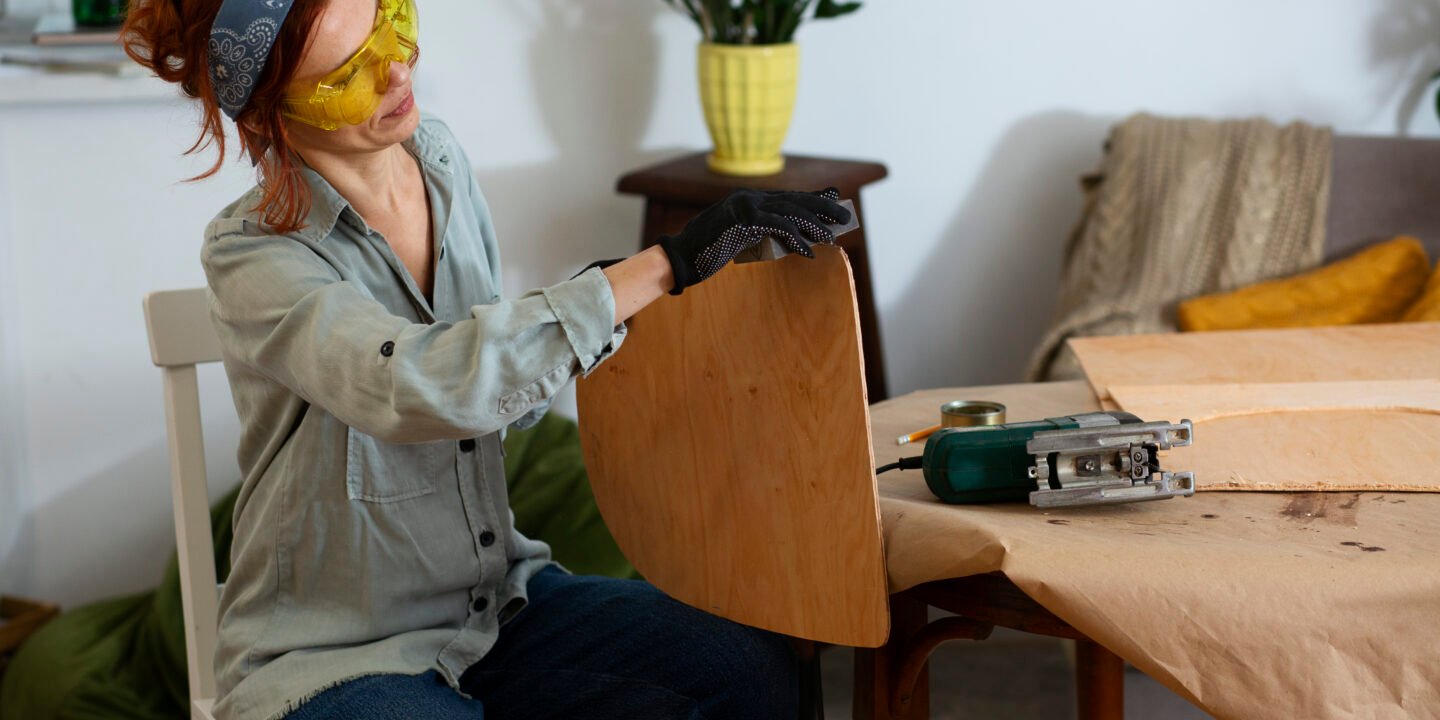
2. Repurpose and Revive Furniture
If you’re tired of your old furniture but don’t want to spend money on new pieces, try giving your current furniture a makeover. With a bit of paint or fabric, you can breathe new life into outdated items.
Chalk Paint Makeover
Chalk paint is a popular choice for DIY furniture makeovers because it’s easy to use and doesn’t require extensive prep work. You can transform a worn-out dresser, table, or chair into a chic, custom piece.
- Materials Needed: Chalk paint, a paintbrush, sandpaper, and a wax finish (optional).
- Steps:
- Clean the surface of your furniture to remove any dust or grime.
- Sand the piece lightly to create a rough surface for the paint to adhere to.
- Apply a coat of chalk paint with a brush, allowing it to dry before applying a second coat.
- Once the paint is dry, you can lightly distress the edges with sandpaper if you want a vintage look.
- Seal the paint with a wax finish for added durability.
This easy DIY project can give your old furniture a completely new look that complements your décor.
Reupholster Chairs or Cushions
Reupholstering is a great way to revamp old chairs or cushions. You can use bold prints or textured fabrics to make a statement in your space.
- Materials Needed: Upholstery fabric, a staple gun, scissors, and a screwdriver (if needed for removing cushions).
- Steps:
- Remove the cushion from the chair using a screwdriver.
- Lay the cushion face-down on your fabric and cut enough fabric to wrap around the edges.
- Pull the fabric tightly around the cushion and staple it to the underside, ensuring there are no wrinkles or loose areas.
- Reattach the cushion to the chair.
Reupholstering allows you to update the look of your furniture without buying new pieces, making it both budget-friendly and eco-friendly.
3. DIY Lighting Projects
Lighting plays a crucial role in home décor, setting the mood and enhancing the overall ambiance of your space. With a few DIY projects, you can create custom lighting solutions that add character to your home.
Mason Jar Pendant Lights
Mason jars aren’t just for storage; they can also be transformed into rustic, stylish pendant lights that look great in kitchens, dining rooms, or outdoor spaces.
- Materials Needed: Mason jars, pendant light kits, a drill, and light bulbs.
- Steps:
- Drill a hole in the center of each Mason jar lid to accommodate the light fixture.
- Thread the pendant light kit through the hole and secure it according to the manufacturer’s instructions.
- Attach the lid to the jar and screw in the light bulb.
- Hang the pendant lights from the ceiling in your desired arrangement.
This DIY project adds a cozy, farmhouse feel to your space while also providing functional lighting.
DIY Lampshade
A custom lampshade can elevate a simple lamp into a design statement. You can use fabric, paper, or even photos to create a unique shade that matches your décor.
- Materials Needed: A plain lampshade, fabric or decorative paper, glue, and scissors.
- Steps:
- Measure the dimensions of your lampshade to determine how much fabric or paper you’ll need.
- Cut the material to size, ensuring it’s slightly larger than the lampshade to allow for overlap.
- Apply glue to the back of the fabric or paper and carefully wrap it around the lampshade, smoothing out any wrinkles as you go.
- Trim the excess material and glue down the edges.
With this simple project, you can customize your lighting to fit your personal style.
4. Create Stylish Storage Solutions
Storage is essential in any home, but it doesn’t have to be purely functional. With a few DIY projects, you can create stylish storage solutions that blend seamlessly with your décor.
Floating Shelves
Floating shelves are an excellent way to display books, plants, or décor items while also keeping your space organized.
- Materials Needed: Wooden boards, brackets, screws, a drill, and a level.
- Steps:
- Measure and mark where you want the shelves to be installed on the wall.
- Attach the brackets to the wall using screws and a drill.
- Place the wooden boards on top of the brackets and secure them in place.
- Use a level to ensure the shelves are straight before tightening the screws.
Floating shelves not only provide extra storage but also serve as a design element that can showcase your personality.
Upcycled Storage Baskets
Rather than buying new storage baskets, consider upcycling items you already have, such as old crates or boxes.
- Materials Needed: Old wooden crates, paint, fabric, or decorative rope.
- Steps:
- Clean and sand the crates to remove any rough edges.
- Paint the crates in a color that matches your décor, or wrap them in fabric or decorative rope for a more textured look.
- Use the crates to store books, magazines, or blankets.
Upcycling old items into storage solutions not only saves money but also adds a personal touch to your home.
5. Incorporate DIY Textiles
Textiles are a great way to add warmth and softness to a space, and there are plenty of DIY projects that allow you to create custom textile pieces for your home.
DIY Throw Pillows
Making your own throw pillows is an easy and affordable way to add color and pattern to your living room or bedroom.
- Materials Needed: Fabric, a sewing machine or needle and thread, and pillow stuffing.
- Steps:
- Cut two pieces of fabric to your desired pillow size.
- Sew three sides of the fabric together, leaving one side open.
- Turn the fabric right-side out and stuff the pillow with filling.
- Sew the remaining side closed.
With this project, you can customize your pillows to match your color scheme or add seasonal décor.
DIY No-Sew Curtains
If you don’t have sewing skills, you can still make your own curtains with this no-sew technique.
- Materials Needed: Fabric, iron-on hem tape, an iron, and curtain rings.
- Steps:
- Measure the height and width of your windows to determine how much fabric you’ll need.
- Cut the fabric to size, leaving a few extra inches for the hem.
- Use iron-on hem tape to fold and secure the edges of the fabric.
- Attach the curtains to the rod using curtain rings.
This project allows you to create custom curtains without the need for a sewing machine.
6. Add Greenery with DIY Planters
Bringing the outdoors inside with plants is an easy way to add life and color to your home. Creating your own DIY planters can enhance your plant display and complement your décor.
Hanging Macramé Planters
Macramé is making a comeback, and creating your own hanging planters is a great way to showcase your plants.
- Materials Needed: Macramé cord, a plant pot, and a hook for hanging.
- Steps:
- Cut several pieces of macramé cord to your desired length.
- Tie the cords together at the top, leaving enough length for hanging.
- Knot the cords together at intervals, creating a net-like pattern.
- Place your plant pot inside the net and hang it from a hook.
This project adds a bohemian touch to your home while providing a beautiful display for your plants.
Conclusion: Transforming Your Space on a Budget
DIY home décor projects are an excellent way to personalize your space without spending a fortune. Whether you’re creating custom wall art, revamping old furniture, or incorporating stylish storage solutions, these projects allow you to transform your home while staying within your budget. With a little creativity and some DIY spirit, you can make your space truly your own. Happy decorating!