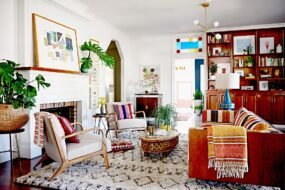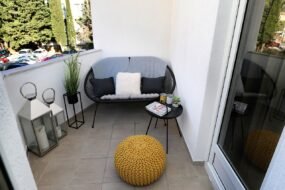
Transforming your home into a stylish sanctuary doesn’t have to mean spending a fortune. With a little creativity and effort, DIY home decor projects can breathe new life into your space, reflecting your unique style and personality. Whether you’re looking to refresh a room, revamp furniture, or add personalized touches, DIY decor offers endless possibilities. In this comprehensive guide, we’ll explore a range of DIY home decor ideas that are both chic and creative, helping you create a space you’ll love.
1. Revitalizing Walls
a. DIY Accent Walls
Accent walls are a fantastic way to make a statement and add visual interest to any room. Creating your own accent wall can be as simple or intricate as you like.
Materials Needed:
- Paint or wallpaper
- Painter’s tape
- Brushes and rollers
- Level and ruler
Instructions:
- Choose a Wall: Select the wall you want to highlight. Typically, an accent wall is one that stands out from the rest.
- Prepare the Surface: Clean and prep the wall. Use painter’s tape to outline the area you want to paint or cover with wallpaper.
- Apply Paint or Wallpaper: If painting, start with a primer if needed, then apply your chosen color. For wallpaper, carefully align and apply the paper, smoothing out any bubbles.
- Remove Tape: Once the paint is dry, carefully remove the painter’s tape.
Tip: Consider using bold colors or patterns for a striking look, or opt for subtle textures for a more understated effect.
b. DIY Gallery Wall
A gallery wall is a versatile way to display art, photos, and decorative items. It can be tailored to fit any theme or style.
Materials Needed:
- Picture frames in various sizes
- Photos, prints, and artwork
- Measuring tape
- Nails or adhesive hooks
- Hammer or screwdriver
Instructions:
- Plan Your Layout: Lay the frames out on the floor to experiment with different arrangements before hanging them on the wall.
- Measure and Mark: Measure the wall space and mark where each frame will go.
- Hang Frames: Use nails or adhesive hooks to secure the frames to the wall, ensuring they are level.
- Arrange Art: Place your photos and artwork into the frames and adjust as needed.
Tip: Mix and match frame styles and sizes for an eclectic look or use matching frames for a more uniform appearance.
2. Furniture Makeovers
a. Painted Furniture
Painting furniture is an effective way to give old pieces a new lease on life. This project is perfect for updating outdated or worn-out furniture.
Materials Needed:
- Sandpaper or a sanding block
- Primer (if needed)
- Paint (chalk paint or acrylic)
- Paintbrushes and rollers
- Sealer (optional)
Instructions:
- Prepare the Furniture: Sand the furniture to remove any old finish and create a smooth surface for painting.
- Apply Primer: If the furniture is particularly glossy or the paint you’re using requires it, apply a primer and let it dry.
- Paint the Furniture: Apply your chosen paint color, starting with thin, even coats. Allow each coat to dry before applying the next.
- Seal (Optional): For added durability, apply a clear sealer once the paint is completely dry.
Tip: For a vintage look, consider using chalk paint and distressing the edges after painting.
b. Upcycled Furniture Projects
Upcycling involves transforming old or discarded furniture into something new and stylish.
Materials Needed:
- Old furniture pieces (e.g., chairs, tables)
- Paint or stain
- Fabric (if reupholstering)
- Tools for assembly and disassembly
Instructions:
- Choose Your Project: Decide which pieces of furniture you want to upcycle and how you want to transform them.
- Disassemble (If Needed): For projects involving reupholstering, remove the old fabric from the furniture.
- Update the Furniture: Paint, stain, or reupholster the furniture according to your design vision.
- Reassemble and Finish: Put the furniture back together and make any final adjustments.
Tip: Incorporate new hardware or decorative elements to enhance the upcycled look.
3. Textile Transformations
a. DIY Throw Pillows
Throw pillows can instantly refresh the look of a sofa or bed. Making your own allows you to choose fabrics and designs that perfectly match your decor.
Materials Needed:
- Fabric (cotton, linen, or velvet)
- Pillow inserts or stuffing
- Sewing machine or fabric glue
- Scissors and measuring tape
Instructions:
- Cut the Fabric: Measure and cut the fabric to the size of your pillow insert, adding extra for seam allowances.
- Sew or Glue: Sew or glue the fabric together, leaving an opening for the pillow insert or stuffing. Turn the fabric right side out.
- Insert Pillow: Place the pillow insert or stuffing into the cover and close the opening.
Tip: Experiment with different fabric patterns and textures to create a collection of pillows that add color and style to your space.
b. DIY Curtains
Custom curtains can enhance a room’s decor and provide functional benefits like privacy and light control.
Materials Needed:
- Fabric (cotton, linen, or a heavier material for drapes)
- Curtain rod
- Sewing machine or fabric glue
- Curtain rings or hooks
Instructions:
- Measure and Cut Fabric: Measure your window and cut the fabric to the desired length and width.
- Hem the Edges: Sew or glue hems along the edges of the fabric to prevent fraying.
- Attach Curtain Rings: If using curtain rings, attach them to the top edge of the fabric. Otherwise, create a rod pocket or use grommets.
- Hang the Curtains: Install the curtain rod and hang the curtains.
Tip: Use fabric with patterns or colors that complement the rest of your room’s decor.
4. Creative Storage Solutions
a. DIY Floating Shelves
Floating shelves are both functional and stylish, providing storage while maintaining a clean look.
Materials Needed:
- Wooden planks
- Brackets or shelf supports
- Screws and wall anchors
- Drill and level
Instructions:
- Measure and Mark: Decide where you want to install the shelves and mark the wall.
- Install Brackets: Secure the brackets or supports to the wall using screws and wall anchors.
- Attach Shelves: Place the wooden planks on the brackets and ensure they are level.
Tip: Paint or stain the shelves to match your decor, and use them to display books, plants, or decorative items.
b. DIY Storage Bins
Custom storage bins help keep your space organized while adding a decorative touch.
Materials Needed:
- Bins or boxes (plain or with handles)
- Fabric, paint, or decorative paper
- Glue or adhesive
Instructions:
- Decorate the Bins: Cover the bins with fabric or paint them to match your decor. Use glue or adhesive to secure the fabric or paper.
- Add Labels: Label each bin to keep your items organized and easy to find.
Tip: Choose fabric or paint colors that coordinate with the room’s color scheme to create a cohesive look.
5. Unique Wall Art
a. DIY Canvas Art
Canvas art can add a personal touch to your walls and is an excellent way to showcase your creativity.
Materials Needed:
- Canvas
- Acrylic paints or watercolor
- Brushes, sponges, or palette knives
- Painter’s tape (for geometric designs)
Instructions:
- Prepare the Canvas: If desired, apply a base coat of paint to the canvas and let it dry.
- Create Your Design: Use brushes, sponges, or palette knives to paint your design on the canvas. Experiment with colors and techniques.
- Let Dry: Allow the canvas to dry completely before hanging.
Tip: Use painter’s tape to create geometric patterns or add texture with sponges for a unique effect.
b. DIY Photo Display
A photo display is a charming way to showcase your favorite memories.
Materials Needed:
- String or wire
- Clips or clothespins
- Wall hooks or adhesive strips
- Photos
Instructions:
- Install String or Wire: Attach the string or wire to the wall using hooks or adhesive strips.
- Clip Photos: Use clips or clothespins to attach your photos to the string or wire.
- Arrange and Adjust: Arrange the photos in a pleasing pattern and adjust as needed.
Tip: Create a themed display for special occasions or seasons, and update it regularly with new photos.
6. Personalized Touches
a. DIY Monogram Decor
Monogram decor adds a personalized touch to your home and makes for a thoughtful gift.
Materials Needed:
- Wooden or metal monogram letters
- Paint or stain
- Decorative elements (e.g., ribbons, flowers)
- Glue or adhesive
Instructions:
- Prepare the Monogram: Paint or stain the monogram letters to match your decor.
- Add Decorations: Attach ribbons, flowers, or other decorative elements to the letters.
- Display: Hang or place the monogram in a prominent location.
Tip: Choose colors and decorations that complement your existing decor for a seamless look.
b. DIY Planters
Custom planters add greenery and style to your home, and making your own allows for creative freedom.
Materials Needed:
- Planter pots or containers
- Paint, fabric, or decorative paper
- Plants and soil
- Glue or adhesive
Instructions:
- Decorate the Planters: Cover or paint the planters to match your decor. Use fabric or paper for a unique look.
- Plant: Add soil and plants to the decorated planters.
- Display: Arrange the planters in your home to add a touch of nature.
Tip: Consider using plant stands or hanging planters for added visual interest.
Conclusion
DIY home decor projects are a wonderful way to personalize your space and express your creativity. Whether you’re revitalizing walls, giving furniture a makeover, or adding unique touches with textiles and art, there are countless ways to transform your home into a stylish and inviting environment. Embrace the opportunity to create something special and make your space a true reflection of your personality. With these chic and creative DIY ideas, you’ll be well on your way to achieving a home that’s not only beautiful but also uniquely yours. Happy decorating!


