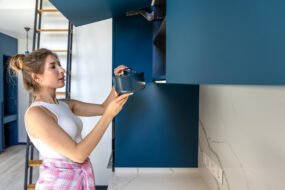
DIY projects are a fantastic way to personalize your space, save money, and gain a sense of accomplishment. Whether you’re an experienced DIYer or just starting, having a detailed guide can make all the difference. Here are some step-by-step guides for a variety of DIY projects that will transform your home and boost your skills.
1. Rustic Pallet Coffee Table
A pallet coffee table adds charm and functionality to your living room. This project is perfect for beginners and can be customized to fit your decor.
Materials Needed:
- Wooden pallets (2-3)
- Sandpaper or sander
- Stain or paint
- Screws and nails
- Casters (optional)
- Glass top (optional)
Tools Needed:
- Hammer
- Screwdriver or drill
- Paintbrushes
Instructions:
- Prepare the Pallets: Sand the pallets thoroughly to remove rough edges and splinters.
- Assemble the Table: Stack the pallets to your desired height, securing them together with screws.
- Stain or Paint: Apply a coat of stain or paint to the pallets. Allow to dry completely.
- Add Casters: If desired, attach casters to the bottom of the table for easy mobility.
- Optional Glass Top: Place a glass top on the table for a sleek finish.
2. Floating Shelves
Floating shelves are a stylish and practical addition to any room. They provide storage and display space without taking up floor area.
Materials Needed:
- Wood planks
- Brackets or floating shelf hardware
- Screws and wall anchors
- Stain or paint
Tools Needed:
- Drill
- Level
- Measuring tape
- Paintbrushes
Instructions:
- Measure and Cut: Measure the space where you want to install the shelves and cut the wood planks to the desired length.
- Sand and Finish: Sand the edges of the wood planks and apply stain or paint.
- Install Brackets: Mark the position of the brackets on the wall using a level to ensure they are straight. Drill holes and insert wall anchors.
- Mount Shelves: Attach the brackets to the wood planks and secure the shelves to the wall.
3. Upcycled Tire Ottoman
An upcycled tire ottoman is a unique and eco-friendly piece of furniture that adds character to your home.
Materials Needed:
- Old tire
- Plywood (cut into circles to fit the tire)
- Foam padding
- Fabric or rope
- Glue gun
- Screws
Tools Needed:
- Drill
- Scissors
- Staple gun
Instructions:
- Prepare the Tire: Clean the tire thoroughly and allow it to dry.
- Attach Plywood: Secure the plywood circles to the top and bottom of the tire using screws.
- Add Foam Padding: Cut foam padding to fit the top of the tire and attach it using a glue gun.
- Cover with Fabric or Rope: Wrap the tire with fabric or rope, securing it with a glue gun. If using fabric, staple it to the plywood base.
- Finishing Touches: Add additional decorative elements if desired.
4. Painted Terra Cotta Pots
Painted terra cotta pots are a fun and easy way to add color and personality to your garden or indoor plants.
Materials Needed:
- Terra cotta pots
- Acrylic paint
- Sealer (optional)
Tools Needed:
- Paintbrushes
- Painter’s tape (for patterns)
Instructions:
- Clean the Pots: Ensure the pots are clean and dry.
- Apply Base Coat: Paint the entire pot with a base coat and let it dry.
- Add Designs: Use painter’s tape to create patterns or freehand your designs. Paint and allow to dry.
- Seal the Pots: Apply a sealer to protect the paint from moisture (optional).
5. DIY Chalkboard Wall
A chalkboard wall is a functional and fun addition to a kitchen, office, or kids’ room, perfect for notes, drawings, and reminders.
Materials Needed:
- Chalkboard paint
- Painter’s tape
Tools Needed:
- Paint roller or brush
Instructions:
- Prep the Wall: Clean the wall and ensure it is smooth and free of debris.
- Tape the Edges: Use painter’s tape to mark off the area you want to paint.
- Apply Chalkboard Paint: Apply the chalkboard paint in even strokes, following the manufacturer’s instructions for drying times and number of coats.
- Condition the Chalkboard: Once dry, condition the chalkboard by rubbing a piece of chalk over the entire surface and wiping it off.
6. Macramé Plant Hanger
A macramé plant hanger adds a boho-chic touch to your home and is a great project for beginners and experienced crafters alike.
Materials Needed:
- Macramé cord
- Ring (metal or wooden)
- Potted plant
Tools Needed:
- Scissors
- Measuring tape
Instructions:
- Cut the Cords: Cut several lengths of macramé cord, ensuring they are long enough to accommodate your desired length when folded in half.
- Attach to Ring: Fold the cords in half and attach them to the ring using a lark’s head knot.
- Create Knots: Use various macramé knots (square knots, half square knots, spiral knots) to create your design. Ensure the hanger is sturdy and balanced.
- Finish and Trim: Once your design is complete, gather the cords at the bottom and tie a knot. Trim any excess cord.
- Insert Plant: Place your potted plant into the hanger and adjust as needed.
7. Customized Light Switch Covers
Customizing light switch covers is an easy and inexpensive way to add a unique touch to any room.
Materials Needed:
- Light switch covers
- Decorative paper or fabric
- Mod Podge or decoupage glue
- Clear acrylic sealer (optional)
Tools Needed:
- Scissors
- Paintbrush
Instructions:
- Cut Material: Cut the decorative paper or fabric to fit the switch cover, leaving a small margin to fold over the edges.
- Apply Mod Podge: Brush a layer of Mod Podge onto the switch cover and place the paper or fabric on top. Smooth out any wrinkles.
- Seal Edges: Fold the edges over and secure them with Mod Podge.
- Seal the Surface: Apply another layer of Mod Podge over the entire surface to seal and protect it. Allow to dry completely.
- Optional Sealer: For extra durability, spray with a clear acrylic sealer.
Conclusion
DIY projects are a wonderful way to personalize your home, learn new skills, and create a space that reflects your unique style. Whether you’re building a rustic pallet coffee table, crafting macramé plant hangers, or painting terra cotta pots, these detailed guides provide the step-by-step instructions you need to complete each project with confidence. Gather your materials, follow the instructions, and enjoy the satisfaction of creating something beautiful and functional with your own hands. Happy DIYing!


